Maybe you’re planning to put your house on the market or just want to do some improvements. If you’re thinking about redoing a floor because of cracked grout, there’s good news. You can fix damaged or cracked grout in most cases. How do you repair damaged grout? Can you put new grout over old grout? Wondering how to remove grout the right way? This blog will answer those questions and more, and you’ll learn how to repair grout like a pro. Whether you’re planning a shower tile repair project or something else, you’ll learn about grout repair necessities.
What Is Tile Grout?
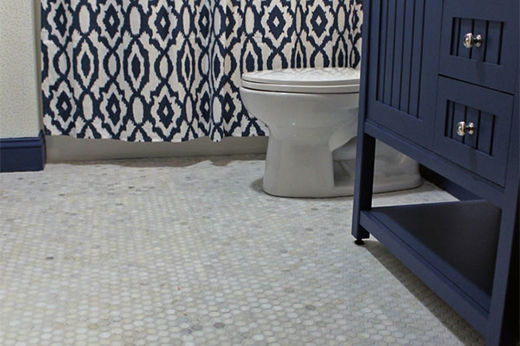
Grout is a mixture of water, sand, and cement in many cases. However, there is also epoxy grout. Although grout has purposes in masonry and other applications, tile grout helps seal spaces between tiles. You’ll usually see it in bathrooms, kitchens, and laundry rooms. Today, some houses have tile floors throughout the home. Over time, grout can crack or get damaged. It can also become discolored or stained from debris and staining liquids.
How Do You Repair Damaged Grout?
If you’re wondering how to redo grout that’s damaged, there are several steps. Each section is divided into five steps to make it simpler. Before you start repairing tile grout, make sure you have the right safety gear. You’ll want a dust mask to avoid breathing in mold or grout dust. Also, you’ll want some goggles to protect your eyes from any flying grout debris. These are the repair steps for a few common types of grout damage.
How Do You Repair Crumbling Grout?
You may notice that grout is crumbling in different places. Poor mixing or application techniques sometimes cause this problem. To remedy it, follow these steps.
1. Remove Crumbling Grout
Use a grout saw, utility knife, or another removal tool. Scrape out the parts of grout that are crumbling. Try to avoid scratching the tile. If the grout is still firm under the crumbling part, don’t scrape deeper than 1/16 of an inch. Use the right type of vacuum to remove the debris. If you noticed mold or mildew, use bleach to clean the scraped areas. Before you move on to the next step, let the grout dry.
2. Mix Grout
Be sure to use the right type of grout for your needs. Most products have straightforward instructions for preparation and application. You can also find instructions on the manufacturer’s site, and some include helpful videos. Mix up only what you’ll use within 15 minutes. You may need to do this several times for large areas.
3. Apply Grout
Whether you’re repairing shower grout or floor grout, it’s important to fill gaps correctly. Use a rubber grout float or your finger to pack it in well. If you use a float, research the correct angles for different applications.
4. Wipe Away Residue
Use a clean and damp sponge to wipe away excess grout from tile surfaces. Wait about 15 minutes before you use a dry cloth to wipe any remaining residue.
5. Seal the Grout
Sealing your grout after you apply it correctly can help protect its longevity. Wait about a week until the grout is completely dry before adding colorant or sealing it.
How Do You Fill in Missing Grout?
Can you fill in missing grout? In most cases, yes. If the surrounding grout is in bad shape, you’ll need to do a little more work. These are the five steps for fixing missing grout areas.
1. Assess and Prepare the Area
Assess the surrounding grout to see if it needs repair. For example, if you’re repairing shower tile grout, you may have crumbling grout in several places. The grout damage often extends beyond broken pieces. If there’s extensive damage and crumbling, follow the steps in the previous section about crumbling grout. Otherwise, move on to the next step.
2. Grind Surrounding Area
Grind or sand down the area surrounding the missing piece. You won’t need to remove a lot of grout. However, you’ll need to remove enough surrounding grout for the new repair product to adhere.
3. Mix New Grout
After you’re done grinding, use a vacuum to remove debris. Follow the instructions on your grout product. There are also pre-mixed grout products for bathroom grout repair. Remember that it dries quickly. Because of this, mix it only when you’re ready to apply it.
4. Apply the Grout
Use your finger or a float to apply and push down the grout. It must be compacted well to fill the spaces and adhere to the existing grout.
5. Seal the Grout
After about a week, apply your chosen sealing product. You can also add colorant at this time.
Can You Fill in Missing Grout?
Why is my grout cracking? Many people ask this and wonder how to fix cracked grout in a shower or on a floor. It’s common for hairline cracks to form over time. Why does grout crack? It often cracks because of moisture changes in framing material. As a result, there’s distortion and shifting. This is a common reason for repairing shower grout or bathroom floor grout. If you’re wondering how to repair cracked grout, it can be hard to know what to do. You can use grout to patch minor cracks, and you can use sanded caulk as a temporary fix. However, it can chip off. The ideal solution is to use the steps in the previous sections to remove old or damaged grout first.
What Happens If You Put Grout on Top of Grout?
While some online sources say it’s okay to put new grout on top of old grout, others don’t. Many say that it depends on how you do it. If you simply apply grout without cleaning or preparing the surface, it can chip away quickly. The key is to have a surface that new grout can adhere to by using a grout removal tool first.
Do I Have to Remove All Old Grout Before Regrouting?
No, you don’t have to remove it all in most cases. Remember to leave enough for the new grout to bond if possible. However, be sure to remove all damaged or crumbling grout. Whether you’re doing shower grout repair or floor repair, be sure to have the right tools for tile grout repair.
What to Use to Repair Grout
Now that you know how to fix cracked grout or damaged grout, be sure to get the right tools. In addition to the safety accessories mentioned earlier, these are some tools you may need:
Grout Pen
A grout pen puts an attractive white or tinted waterproof coating over grout lines.
Grout Removal Tool
A grout remover tool, like a saw or a rotary tool, will help loosen old grout.
Grout Float
A grout float helps smooth and pack in the grout. You will also need cleaning supplies for dirty or moldy grout and a shop vacuum to remove grout dust.
Find Grout Repair Supplies at True Value
Now that you know how to fill grout lines, how to repair grout and more, start planning. Head to your nearest True Value store for all your grout repair tools and supplies.