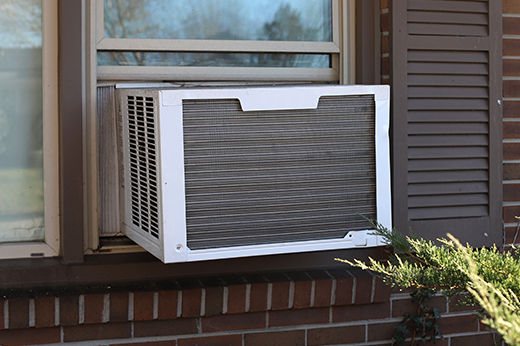
Step 1: Finding Air Leaks & Drafts in Your Home
The first step to sealing air leaks inside your home is to find out where they are. There are a few common locations with which to start. Doors and windows are usually thought of as the most obvious culprits of inside air leaks since they are constructed openings into your home. And they are often sources of air leaks. However, they are not always the worst offenders. Attics and basements usually provide the most entrances for air to get inside and for the escape of air to the outside. And these two areas work together to make your home inefficient: Warm air rises up into the attic and sucks cold air in through leaks in the basement. This is often referred to as the “chimney effect.”
But really, there are many places where air can get in and out. Often, these are areas where separate materials meet, such as between the foundation and walls or between siding and brick. Other culprits are openings for utilities, including electrical, gas, and cable, and openings for dryer vents and HVAC systems, as well as recessed “can” lights.
To find leaks, turn off your HVAC system, preferably on a windy day. Close all windows and doors and turn on any bathroom or kitchen fans that blow outside. Hold a flame around the edges of windows, doors, and any other potential sites for air infiltration. If the flame flickers in a way that insinuates air is affecting it, you have an air leak. Using a candle is ideal because you can use its flame as well as blow it out and watch how the resulting smoke moves to determine if there is a leak.
Safety Alert!
Be careful using the candle method around flammable materials such as drapes and other furnishings. Use your discretion as to whether using a flame is feasible in each area you’re checking.
At night, you can try shining a flashlight over potential leak areas inside while someone outside looks for the light to appear on the other side. Note that this will only work for larger leaks.
Helpful Tip
If you can’t find leaks using the above methods or you want a thorough leak investigation done, you can hire a professional to perform a blower door test in your home. This is a fan that is mounted into the frame of an exterior door that pulls air out of the house, lowering the air pressure inside. This causes the outside air pressure to flow in through cracks and openings, revealing leaks.
Step 2: Seal Wall, Window, and Door Leaks
Seal any openings where windows and doors meet trim by applying clear indoor acrylic caulk with a caulking gun. You can also use this caulk to seal gaps between the wall and trim, baseboards and anywhere where different building materials meet and potentially create gaps.
Add weather stripping around windows and doors. For doors, remove any previous weather stripping and clean the area with mild detergent and water. Always remove old weather stripping and any adhesive before installing new weather stripping. Foam tape weather stripping installs easily and usually comes with peel-off backing. Use a utility knife to cut the foam to the correct length. Peel off the backing and press the stripping against the doorstop just behind the latch area. For windows, clean both window sashes and remove any adhesive residue from old weather stripping.
Using mild detergent and water, clean both window sashes. The window sashes are the “frames” directly around each of the windowpanes. There will be a lower and upper sash. Make sure no dirt or grease remains. Remove adhesive from any old weather stripping, using a glue and adhesive remover for stubborn adhesive. Dry the area with a clean cloth. Measure the bottom of the lower sash and the top of the upper sash, and then cut the foam tape with a utility knife to fit these areas. Peel off the backing and press into place. When these sashes are closed, the foam tape will form an airtight barrier so that no outside air can get in and inside air can’t get out.
Install a door sweep. With the door closed, place the sweep on the bottom of the door and check to see that the sweep’s rubber gasket seals tightly against the threshold. Look for any light shining from outside in under the sweep. If you see any, adjust the sweep until it’s blocked out. When you see no more light, the sweep is correctly in place. Use a pencil or pen to mark where to drill holes for the supplied screws. Use a drill to pre-drill the holes and then fasten the sweep to the door with a screwdriver.
Helpful Tip
Door sweeps are manufactured to fit standard door sizes and should fit your door right out of the packaging. If not, just measure the door and cut the sweep to fit using a hacksaw.
Step 3: Seal Basement Leaks
There are common areas in the basement where leakage often occurs. One of them is between the sill plate and the foundation, and at the bottom and top of the rim joist on each side of the house. This is generally where the cement foundation meets the wood frame of the house. If your basement is unfinished, this will be easy to locate. If your basement is finished, you most likely have insulated stud walls and little air leakage. Use silicone caulk to seal gaps and cracks at the rim joist that are ¼” in size or smaller. You can use expanding foam sealant into gaps that are larger than ¼” to about 3”. Take note of any openings going to the floor above the basement for wiring and pipes. Also, examine openings for your dryer vent and HVAC system. These can also be sealed with either caulk or foam sealant.
After sealing the rim joist area, you can then add insulation to the area for even better efficiency. Measure each space between the floor joists and the rim joist using a tape measure, and then cut a piece of rigid foam board insulation to fit the space using a utility knife. It should fit exactly in place. Use an appropriate adhesive if necessary. Repeat until you have insulated the entire perimeter of the rim joist.
Step 4: Seal Attic Leaks
Ascend into your attic and look around. Get your bearings and look for the areas where leakage is likely to be greatest. This will be where both interior and exterior walls meet the attic floor. Start looking at the existing insulation between the joists in the floor. Pull back the insulation to look underneath. If it is black or otherwise looks dirty in spots, you’ve found a potential air leak. The leaking air passes through the insulation, making the insulation act like a filter, leaving the dust and dirt behind. Examine the area closer to determine where the leak is coming from. If you find it, you can seal it by using silicone caulk or expanding foam sealant, depending on the size of the leak.
Seal the wall plate (where the top of the walls meets the floor/ceiling joists in the attic) to ensure air does not leak at the outer edges of your attic/roof. You can do this with expanding foam sealant. Do the same around the top plates of interior walls underneath the attic floor. You can spray expanding foam between the drywall and framing.
Check ceiling light boxes (they will be at your feet in the attic) to see if you can see around them into the room below. If so, seal any holes around the boxes with caulk or foam sealant. Don’t forget to seal around any ductwork from HVAC systems in your attic.
Add more insulation, if necessary. A good rule of thumb to follow is if the insulation batts don’t sit above the top of the joists, you probably need to add more.
Safety Alerts!
Wear pants, gloves, and a long-sleeve shirt to keep fiberglass insulation from irritating your skin.
Wear safety goggles and a dust mask while working in your attic to avoid nose and throat irritation due to dust and debris from insulation and attic surfaces.
Watch your step. Most attic “floors” are just the joists with insulation between them, and it would not be difficult to accidentally step between the joists and push your foot through the ceiling below. Bring up a panel of plywood as a work platform to make the job easier and safer.
Congratulations! You’ve found and sealed your home’s air leaks and made your home more efficient.
Project Shopping List
Here’s what you’ll need to complete this project successfully.