Step 1: Remove Old Lockset/Deadbolt
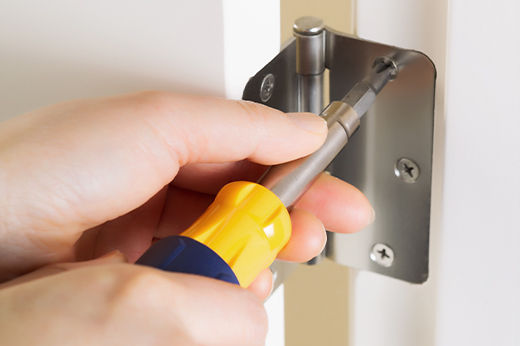
Remove the existing lockset by taking apart all the components. This process will vary, depending on the make and model, but in most cases, you can start by removing the faceplate, using a screwdriver to loosen the mounting screws on the inside of the door. Keep the door open while you work and remember to hold onto the knob as you remove the faceplate to keep the exterior knob from falling and marring the floor or other adjacent surfaces. Then remove the two screws that secure the spring latch assembly and pull it out from the door.
Step 2: Drill Holes for Lockset and Deadbolt Assembly (if applicable)
If installing a new lockset and deadbolt onto a new door that has not yet been drilled, use a tape measure and the template supplied with the new lockset and deadbolt to determine the proper height for the locks and to locate and mark the holes’ centers. Locksets are typically placed 35″ to 38″ high from the floor. Deadbolts are usually 4″ to 6″ above the lockset. Attach the supplied templates to the door using tape as directed by the manufacturer. Use a nail or awl to mark where the center of each hole will be by poking a hole in the template at that location. This is the center point where you will drill.
Helpful Tip
Remember that if you are using existing jamb hardware for the new lockset and deadbolt, the new door hardware must be at the same height in order for them to work together and close correctly.
Next, use an electric drill and a hole saw to drill holes for the lockset, as well as for the deadbolt, through the face of the door. The manufacturer’s instructions should tell you the appropriate size of hole to create for each one. To avoid splintering, start drilling the hole on one side of the door and stop when the hole saw’s pilot bit penetrates the door. Then complete the hole from the other side of the door. Use a 7/8″ or 1” spade bit (depending on the manufacturer’s instructions) to create the hole for the latch in the edge of the door.
Step 3: Chisel the Door Edge and Jamb (if applicable)
Chisel the door edge and jamb so that the latch plates are flush with the door edge and strike plates are flush with the jamb for a new installation. They must be flush so that the door opens and closes properly. Insert the latch and trace around the latch plate so you can chisel around the plate. Use a hammer and a sharp chisel to cut around the latch plate, so the plate will sit flush with the door edge. Cut around the latch plate about ¼” deep and then chisel out the area. Similarly, trace the strike plate on the jamb. To chisel the jamb for the strike plate, use a 7/8-inch spade bit to bore two overlapping 5/8″ holes above and below the center point. This is where the latch bolt will enter when the door is closed.
Use this same process for the deadbolt latch and strike plate. Follow all manufacturer instructions.
Helpful Tip
Check to ensure that both the spring latch and deadbolt latch slide easily into the holes you created in the jamb before proceeding. Also, ensure that the latch plates and strike plates are flush. If they do not sit below their respective surfaces, continue chiseling carefully until they fit.
Step 4: Install Lockset and Deadbolt Assemblies
Install the new lockset and deadbolt, following all manufacturer instructions carefully. For most models, you will insert the spring latch into the hole, checking that the latch plate is flush with the edge of the door. With the latch in place (drill pilot holes for the screws first, if a new installation), attach the plate with a screwdriver and the provided screws. Insert the inside knob of the lockset and then the outside knob, making sure that the inside knob’s spindle inserts into the outside knob securely and that both sit flush against the door surfaces. Then attach the inside knob faceplate using the provided screws and a screwdriver to secure the lockset in place.
Helpful Tip
Holding the two sides of the lockset in place while you attach them with screws can often be difficult. Enlist an assistant to help you, if need be.
Attach the strike plate to the jamb using a screwdriver and the provided screws. Test to ensure that the door opens, closes, and locks properly.
To install the deadbolt, follow the manufacturer’s instructions. You will most likely use the same process you used for the lockset to install the deadbolt latch and its corresponding strike plate in the jamb.
Great job! You’ve successfully installed security locks on your door and made your home more secure.
Project Shopping List
Here’s what you’ll need to complete this project successfully.