
If you want to refresh your kitchen or bath but don’t have the time or money to spend on a complete overhaul, try replacing old, outdated cabinet hardware. These may seem like small changes, but the effect they can have on your kitchen and bath’s appeal is worth the do-it-yourself effort.
Replace Hardware
Replace old, dingy or just plain boring hinges, doorknobs and drawer pulls with new ones to instantly give bathroom or kitchen cabinets a fresh new look. If you have a more traditional eye for style, shop for brushed or polished finishes, in brass, bronze, pewter or even ceramic pulls or knobs. If your style is contemporary, choose high-gloss metals such as nickel or stainless steel. For a more modern look, choose sleek nickel or stainless steel pulls, instead of knobs.
HELPFUL TIPS
Don’t forget to make sure your new hardware matches your new faucet. You don’t want brass hardware and a stainless steel faucet.
Don’t just swap out knobs and pulls. You also want to replace hinges and catches to match the new exterior hardware.
Step 1: Remove Old Hardware
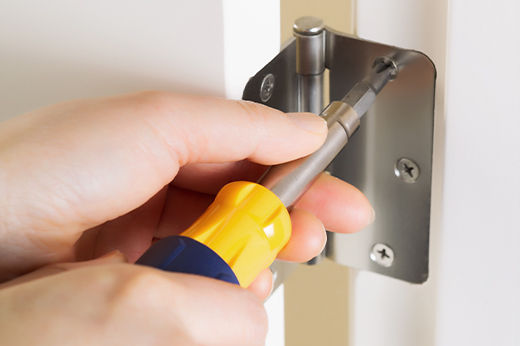
Remove existing hardware with the necessary tools. In most cases, this will be just a screwdriver. For cabinet doors, as opposed to drawers, remove the door completely by detaching the door hinges from the cabinet frame.
Step 2: Remove Hardware Blemishes/Damage
Once you’ve removed a knob or pull, there will most likely be a mark left on the cabinet surface due to the amount of time that the hardware has been in place. Use a mild detergent, water and a sponge or rag to clean off any residue that was hidden under the hardware. For tough, gummy residue, use steel wool or a fine-grit sandpaper to lightly scrub it away. Be sure that you don’t rub too hard or in too large of an area; you don’t want to scratch or otherwise mar the surface before you add the new hardware.
If you’re going to be adding hardware with different screw alignments, you need to patch the old hardware’s holes before drilling new ones. Use a wood putty stick to fill in the old holes and wipe away any excess with a rag. Find a putty color that’s as close to your cabinet’s wood tone as possible.
Step 3: Install New Hardware
Attach new cabinet hardware the way you removed it, by attaching it with a screwdriver and the screws or other fasteners provided with the new hardware. If you have to make new holes for screws, do so with a power drill and a drill bit that is approximately the same or a size smaller than the screws that will fasten the hardware to the door or drawer. Before drilling, measure the drawer’s surface with a tape measure to be sure you’re installing the knob exactly in the center of the drawer’s surface.
If you’re installing pulls with more than one screw location, measure the distance between each screw on the hardware and transfer the measurement to the cabinet or drawer and mark the locations with a pencil. Be sure you place the pull in the center of a drawer by measuring the drawer face. Also, use a level to be sure your new pull will be installed in the right place.
That’s it, you’re done! Enjoy your kitchen and/or bath’s fresh, new look.