Helpful Tips
If you are unsure which trees are best for your needs and the region in which you live, ask someone at your local True Value for suggestions.
Always pick up the tree by the root ball, not the trunk, to avoid damage.
Prioritize planting trees that are native to your region.
If you want to plant trees that grow quickly, consider Crape Myrtle, American Red Maple, Pink Dogwood, River Birch, Eucalyptus or Weeping Willow, among others.
If you are looking for a tree that doesn’t require a lot of maintenance, consider planting River Birch, Crabapple, Hemlock or Red Cedar trees, among others.
Step 2: Prepare the Ground for the Tree
Decide where the tree will grow best and then start digging. When planting a tree, you want to make sure it is in an area with adequate sunlight. Also keep in mind that a tree will need plenty of room as it grows, so don’t plant it too close to other trees or structures. Check the amount of water in the area you’re considering. Wherever you plant the tree, the area should have good drainage. Too much water can cause disease, injury to the roots or even death in trees.
Use a shovel to dig a round hole two- to three-times wider than the root ball. The hole should be slightly less deep than the root ball is high. Take measurements using a tape measure or yardstick if you don’t feel comfortable estimating the depth and width of the hole.
Safety Alert!
Before you start digging, it’s a good idea to check with your local utility companies about gas, water or telephone lines or any other utility line that could cause either a disruption in service or a potentially dangerous situation, such as a ruptured gas line.
Helpful Tip
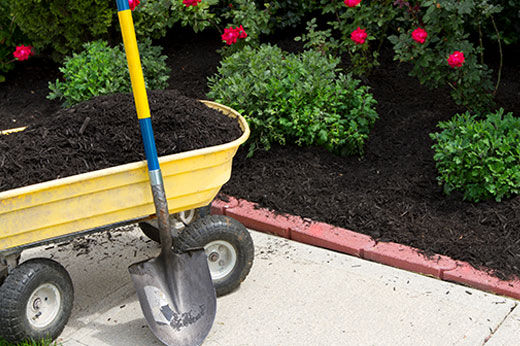
Save yourself considerable cleanup time by piling the soil you’ve dug out onto a plastic sheet or tarp. This also prevents the piled dirt from damaging the grass around the hole.
Step 3: Place the Root Ball in the Ground
Stamp down the soil in the bottom of the hole with your foot, so it is firm and won’t sink when the tree has been planted. Place the root ball into the hole. Check to see that the top of the root ball is flush with the ground or a little higher than ground level. Use a utility knife to cut any twine wrapped around the trunk and fold down the burlap around the sides of the root ball. Don’t remove the burlap completely as this can damage the root ball. The tree’s roots will grow through the burlap into the surrounding soil and the burlap will eventually deteriorate.
Fill in the hole around the sides of the root ball and pat it firmly around the ball. Form a ring of soil around the bottom of the tree that will allow water to pool there like a basin. This will help keep the roots well-watered until the tree is established. Add 2″ to 3″ of mulch to combat weeds, retain moisture and insulate the tree from temperature extremes. Be careful not to cover the trunk; keep a no-mulch ring of 1” to 2” around it.
If your tree is bare-rooted, prune any damaged or unhealthy-looking roots (healthy roots should have abundant root hairs). Then build a cone-shaped mound of dirt in the center of your hole and set the tree on it so the trunk flare (where the roots spread at the base of the tree) is visible and the tree’s crown is 2″ above the top of the hole. This allows for settling to occur naturally. Fill in the hole and pack the loose dirt around the trunk.
Helpful Tip
It’s a good idea to mix some peat moss and a small amount of plant food into the soil you replace around your new tree.
Some trees may need to be staked in place to avoid damage from the wind or to simply be held in place while settling occurs. On each side of the tree, hammer standard wood stakes into the ground with a mallet and tie a length of string from the stake to about halfway up the tree. Tie it firmly but give it a little room to flex in the wind.
Step 4: Wrap the Tree Trunk
Cover the lower part of the tree’s trunk with a tree wrap to protect it. Start the wrap just above the roots slightly below soil level. Continue wrapping to just below the lowest limb. Tie the wrap into position with cords.
Step 5: Water Your Tree
Water the root ball as you water the area around the tree. You’ll need to do this until new roots grow out of the ball and into the soil. Regularly check the moisture in the tree’s area for the first month or two after planting. Provide at least 1″ of water per week during the growing season.
Great job! Your tree-planting project is complete.
Project Shopping List
Here’s what you’ll need to complete this project successfully.