Dogs need plenty of exercise and free reign to roam. This often can conflict, though, with your neighbors and the integrity of your landscaping. While a fence around your property can keep your dog enclosed and safe, it doesn’t keep your dog from doing what dogs can do to your yard. Give your dog the outside space he needs while keeping your landscaping free of dog waste and destruction by building a dog run.
A dog run is a fenced-off, enclosed or otherwise separate area for your dog to exercise freely and to use a designated area away from your landscape. Fenced-in runs also protect your flower beds and other areas that a dog often gets into. It can be as simple as a designated area enclosed with chain-link fencing and/or just a mulched or graveled spot along the side of the garage. Or, they can be more complex, paved with concrete and enclosed with a roof for keeping dogs in the shade while they’re in the run.
Step 1: Determine Location and Size
First, choose the location for your run. Take into consideration how much space you require and how much you have to work with. Keep in mind that dog runs are most effective the longer they are, allowing dogs the room to run back and forth. The run does not have to be large — think of the shape as a narrow rectangle rather than a square, providing ample room to sprint up and down. However, a square run is adequate if that’s the only shape that will work in your yard. At a minimum, make a dog run that is at least 3′ wide and about 10′ long. Your dog’s size should be considered as well. Large dogs, of course, need more space than smaller breeds.
HELPFUL TIPS
If your dog currently has a dog house or you want to build a dog house in your dog run design, be sure you allow room for it when figuring out the dimensions of the space.
Get fencing that is high enough that your dog cannot jump over it.
Use a tape measure to figure out the dimensions of your dog run. For example, if the run will be 4′ wide and 15′ long, measure out the dimensions where you want the run located and mark them with a chalk line or with stakes and twine.
Step 2: Prepare Area
Use a level-headed rake, or better yet, a garden tiller, to remove the grass and loosen the topsoil in the staked off area. Dig out the dirt in the area to a depth of about 3″ to 4″. Then tamp down the soil with a tamper. If you’re just going to fill the area with mulch or wood chips and plan on training your dog to use the area without fencing, you’re almost done.
If you will be adding fencing, you’ll want to create holes now for the fence posts on which to install your chain-link fence. First determine the end on which you will install your fence gate or door. Then starting with a corner, use a post-hole digger to dig 12″ to 24″ holes twice as wide as the diameter of your fence posts, about 3″ from the edge of the “floor”, at equidistant intervals along the length of each side. Your fence support posts will be placed in each hole. See Step 4 for further fencing instructions.
SAFETY ALERT!
Before digging, contact your local utility companies to see if there are any underground power or gas lines nearby.
If you’ll be pouring concrete for the “floor” of your run, you’ll have to build a “form” to mold the poured concrete into the right shape. Use pieces of 2″ x 6″lumber to create the form, cutting to fit when necessary, using a circular saw. Fit the pieces of lumber on their edges along the border of your dug out area until you have “walls” around the run location. Fasten the pieces together using wood screws and a power drill. See the steps for pouring concrete in Step 3.
Step 3: Lay Down the Floor
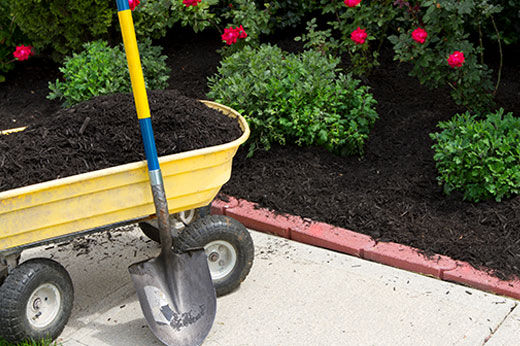
For a simple mulched dog run, fill in the space you dug out with mulch, evening it and leveling it out with a level-headed rake until the mulch has completely covered the space about 2″ above ground level. Frame the mulched area with railroad ties or similar large pieces of lumber to keep as much mulch as possible inside the area. Think of it looking sort of like a sandbox. Mulch or similar material such as wood shavings works well because it is easy to clean up and to replenish when needed. Using a rake, dog waste can also be mixed in and covered up with the mulch and it becomes almost composted. Over time, though, all the mulch will need to be replaced even if you’re diligent in cleaning up soiled spots regularly to avoid odors and other potential issues.
HELPFUL TIPS
Cedar mulch can often be a good choice because the oils present in it can repel insects. Just watch your dog to make sure he isn’t ingesting cedar mulch, which can lead to health issues.
Train your dog not to eat any kind of mulch if you notice that it is happening.
Soak the mulched area with water from a garden hose regularly to keep urine odor from becoming too strong.
If you’re building a dog run with a concrete floor, spray the dug-out area with water from a garden hose so that it is soaked. This will keep your concrete from drying out too quickly when you’re pouring. Fill a wheelbarrow with concrete mix and water as directed by the manufacturer’s instructions located on the package. Keep in mind that it may take several wheelbarrows full, depending on the size of your run. Pour the concrete from the wheelbarrow into the dug-out area, spreading it out into corners and edges with a shovel. Fill the area this way until the concrete is just above the sides of the form. Even it out and level it using a board as a “float”, running it across the top of the slab until it’s even with the sides of the form and flat. When the surface has been smoothed, let it set for the amount of time recommended by the manufacturer.
HELPFUL TIP
If you feel that pouring the slab will be too much for you to handle on your own, consider having a professional come out to pour and smooth out the concrete..
SAFETY ALERT!
Be sure to wear safety glassesgloves and protective clothing while working with concrete, because it may irritate your eyes and skin.
Step 4: Install Fencing
Fill the bottom of each of the holes you dug in Step 2 with about 2″ of gravel or crushed stone for drainage. Mix dry concrete and water in a wheelbarrow as directed by the manufacturer. Place one of the support posts into a hole and hold it so it’s centered in the hole. It helps to have someone hold the post steady as you shovel the prepared concrete mix into the hole. Use a level to make sure the post is straight. Level the concrete off with a shovel, just a few inches on top of the hole. Slope the concrete around the base of the post to allow for water runoff. To reduce any air pockets, poke a small stick into the concrete in a few random places.
HELPFUL TIP
If you don’t have another person to assist you, use two long pieces of rope or wire to steady the post as you pour. Tie the rope or wire around the center of the post and use two stakes to secure the post in an upright position.
Repeat the process with each of the support posts. Let the concrete dry and set for the time recommended by the manufacturer.
Now you need to attach the fencing to the posts. Begin at one corner, attaching the fencing at the top and bottom of the post with fence ties and pliers. You must bend the ties with the pliers so that they go through a link in the fence and then attach to the post. Follow any instructions included with your fence hardware. Unroll and stretch the fencing to the next post and fasten it to the post with fence ties and pliers. Be sure that you’re stretching the fence as tight as you can as you move along. Have someone help you if need be. Repeat the process until you’ve installed each side of the fence.
SAFETY ALERT!
When stretching the fencing, wear heavy work gloves to protect your hands and make the job easier.
Attach the fence gate to the opening you left, by fastening the gate hinges and latch as directed by the manufacturer.
HELPFUL TIP
After gate installation, check to be sure that the gate doesn’t leave a gap on the bottom or either of the sides through which your dog can slip through.
Step 5: Add Roof (Optional)
To keep your dog in the shade, cover the top of your run with tarps. Using tarps instead of a permanent roof allows you to remove it when desired. Fasten the tarps to the top of the fence with plastic cable ties. These are easily replaced if you need to remove the tarp. It’s unlikely that you’ll need or want to cover/re-cover often.
Congratulations! Your best friend now has a place to get exercise safely and securely.