Whether your yard is bald and bare, or the grass looks thin, one thing is certain — patchy lawns look terrible. Until automatic, self-repairing lawns are invented, the next best thing is quick and easy bare spot repair. Keep reading to find out how to patch and repair bare spots using the best products and tips for the job.
Step 1: Ready, Set, Repair
Throughout the seasons, a number of things do a number on lawns — foot traffic, pets going about their business, rodents and insects and even ice-melting salt during the winter. You can easily repair thin or bare areas with an all-in-one product, like Scotts® EZ Seed® grass seed. Guaranteed to grow grass anywhere, EZ Seed® features a unique combination of Scotts® high-performance seed, continuous-release fertilizer and Scotts® super-absorbent growing material that expands as it absorbs water, helping keep seed from drying out.
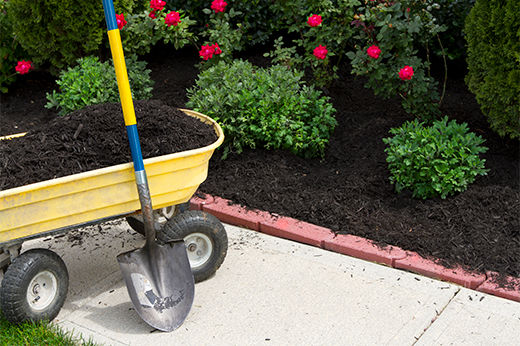
Before applying EZ Seed®, always rake up the top layer of soil and remove any dead grass — your new seedlings will need contact with the soil and room to establish their roots. Now apply EZ Seed® and water in!
If your grass is a St. Augustine grass lawn, you’ll want to sod or plug your bare spots. Purchase a few pieces of sod or enough plugs to cover your bare spots from your local garden center. Then prepare the area by applying a generous layer of Scotts® Turf Builder® Lawn Soil. Scotts® Lawn Soil provides an excellent base for new sod or plugs because it improves moisture retention. Lay the sod pieces or plugs directly on top of the soil, tamp down with your feet, then water. Water grass daily for a least a week, and then only as necessary.
Helpful Tip
If you don’t know what type of grass you have, cut out a small sample from a good spot in your lawn and bring it in to your local True Value hardware store for a little help. There are many grass types and seeding solutions from which to choose.
Grass seed germinates in temperatures between 60 and 80 degrees Fahrenheit. If you live in the North, spring and fall are the best times to plant. If you are in a Southern region, spring and early summer are the best times for you to repair your lawn.
Step 2: Fertilize Regularly
Regular feedings help your lawn to be its best and keep it strong in the face of future problems. For your best lawn feed about every 6-8 weeks.
To make the job easier and more efficient, use a broadcast spreader. This particular type of spreader covers the most area evenly and quickly. Pour the recommended amount of fertilizer into the spreader hopper.
Helpful Tips
Measure your yard in square feet. Instructions on the fertilizer package will inform you of how many pounds or ounces (for liquid fertilizers) per square feet need to be applied. For reference, 10 lbs. per 1,000 sq. feet is a common application.
Helpful Tips
Don’t fill the spreader hopper over your lawn. The fertilizer can spill, and in high concentrations, actually harm the grass instead of helping it
Apply the fertilizer in the same way you would mow. Using a sidewalk, driveway or other non-grass surface as a guide and a starting point, begin pushing the spreader parallel to the surface and work your way across the lawn, turning at each end and directing the spreader alongside the row you just completed so that coverage almost overlaps. The fertilizer drops from the hopper and is dispersed as you move. Keep a slow, steady pace. Read your spreader’s manufacturer’s instructions for exact directions on how to use it. Many models allow you to set the amount that is dispersed. Be careful that you don’t over-fertilize by checking the fertilizer package to verify the recommended spreader setting.
Tender seedlings, as well as existing grass, need nutrients to help grow thick and full. For southern lawns, immediately after repairing bare spots with Scotts® EZ Seed®, feed your whole lawn with Scotts® Southern Turf Builder® with 2% Iron. Designed especially for Southern lawns affected by brutal heat and drought, Southern Turf Builder® delivers much-needed nutrients to stressed and hungry lawns.
Newly planted seeds need food to grow. If you used Scotts® Turf Builder® Grass Seed you can apply Scotts® Turf Builder® Starter® Food for New Grass in two to four weeks after planting, while EZ Seed comes with lawn food already in the product. Once your grass is established, you can use Scotts® Turf Builder® Lawn Food every four to six weeks to make sure it has the nutrients it needs to stay thick and green.
Helpful Tip
Hold off on weed control products until the grass is well-established. A good rule of thumb is to wait until you have mowed at least four times.
Step 3: Water Well
Water the newly seeded or sodded areas frequently until seedlings develop and have a chance to fill in, usually one to four weeks. Then water less frequently. It’s best to water deeply once a week under normal weather conditions or a bit more often when it’s extremely dry. A good, thorough soaking rather than a quick watering ensures that the water gets down to the root system. This helps roots grow strong and deep for a thick, more drought-resistant lawn.
You can mow your new grass once it is between 2” to 3” tall.
That’s it! Here’s to a thick lush lawn that’s the envy of the neighborhood.