2. Paint
Refresh the Exterior
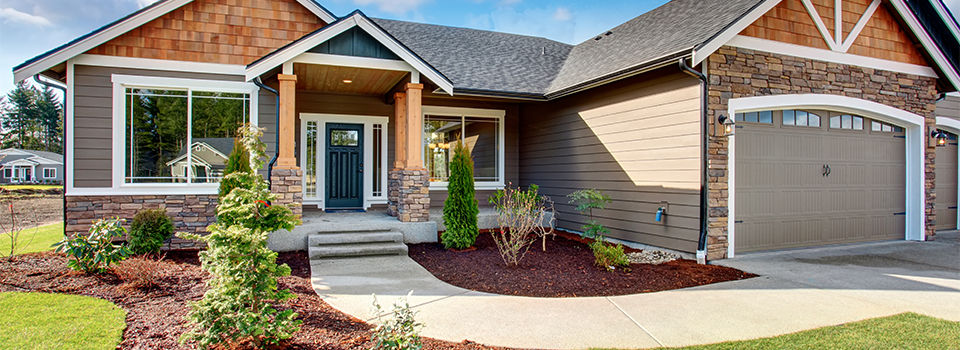
A fresh coat of paint can liven up the look of your home. When painting aluminum or vinyl siding, use an exterior latex primer and paint such as True Value EasyCare Ultra Premium Exterior Paint in Satin Finish. If you will be painting brick, concrete or stucco, prime with a latex masonry and concrete primer/sealer and paint with True Value EasyCare Ultra Premium Exterior Masonry/Stucco Paint. If you have wood siding, use True Value EasyCare Ultra Premium Exterior Primer/Sealer and then paint with True Value EasyCare Ultra Premium Exterior Paint.
Flat and satin sheens are good for exterior siding because they’re non-reflective. Semi-gloss and gloss sheens are typically used for shutters and trim. Vinyl or aluminum siding that is slightly dented or worn looks best when repainted with a flat sheen because it camouflages imperfections more; a satin finish is a better choice when the siding is in good condition. Semi-gloss finishes are tough, easier to clean and resistant to mildew and chalking.
SAFETY ALERT
When using a ladder to reach high areas, invest in an adjustable ladder stabilizer that attaches to the ladder and braces onto the roof. For more detailed information, read Refresh Your Home’s Exterior.
3. Prune
Maintain Your Landscaping
Your plants, shrubs and flowerbeds need regular trimming, weeding, raking and mulching. And that goes for your lawn, too. Make sure you keep it freshly mowed and edged against sidewalks and walkways (and don’t forget to pluck any weeds growing in sidewalk cracks or between bricks).
If your grass looks unhealthy, bring it back to its full, green lushness by fertilizing, and reseeding any thin or dead patches. When adding fertilizer, carefully read product instructions before applying.
If reseeding, use a hand rake to loosen and turn over the soil. This allows the soil to receive more oxygen and water. Or use an aerator to thoroughly stir around the loose soil to prepare it for fertilizer, seeds and water. Water the area, giving it a good, long soaking. Spread fertilizer and topsoil (if needed) to the patch and then water thoroughly again. Spread grass seed over the area using a seed spreader (for larger areas) or by hand (for small patches). Lightly aerate the soil again using the hand rake or an aerator to work in the seeds and fertilizer into the soil. Water the spot every day for a month or so until the grass blends in with the rest of the lawn.
HELPFUL TIPS
- Add hay or straw mulch to facilitate sprouting, particularly on sloping areas. This helps prevent soil erosion and cuts down on watering. However, don’t use too much mulch. The more you use, the more likely you are to get weeds.
- Don’t start mowing until the new grass is about 1½” tall.
4. Repair
Fix Driveway Cracks
Is your driveway fading, or cracking and crumbling? Patching cracks in asphalt and concrete driveways will prevent water seepage and further cracking. You can find everything you need at your local True Value hardware store. Whether your driveway is concrete or asphalt, before you patch, wash it with a pressure washer and let it dry.
For asphalt driveways, choose a water-based acrylic filler/sealer. For best results, use filler/sealers that fill cracks up to 1/8″ wide and look for crack fillers that contain rubberized asphalt emulsion.
For cracks up to ½”, use crack filler. Be sure to keep the filler in the crack, not on the driveway surface. For cracks ½” to 2″ wide, fill the crack with nonporous foam backer rod material before applying crack filler. Potholes or cracks that are wider than 2” require a little more repair. You will need to use cold-patch blacktop to fill them. After filling holes and cracks, seal the asphalt with asphalt sealant.
To fill hairline concrete cracks, you can usually use a patching compound to make the repair.
SAFETY ALERT
Use gloves, goggles and a dust mask when preparing the driveway or handling cement products.
To patch large concrete cracks (more than 1/8” wide and 1/2” deep), use foam backer rods and then patch the area as you would with a small crack. For more detailed steps, read How to Repair Driveway Cracks.
Maintain Your Front Door or Entryway
An updated front door and entryway instantly upgrade the look of your home. If your door is dirty but in good shape, a thorough cleaning, refinishing, staining or painting often does the trick. Read How to Replace Front Door Hardware for more tips and advice on refreshing your front entryway.
Fix Window Screens
Check your window screens for damage. If they’re torn, a simple patch can substitute for a replacement. First, measure the hole in your screen. Holes that are ¼” or smaller can be patched with a little dab of nail polish, clear glue, or an adhesive, such as rubber cement. After the glue is applied and hardens, it forms a seal that keeps out little intruders. If the hole is bigger, you’ll need to patch it.
If you have an unused old window or door screen, you can cut a patch from it. If not, your local True Value hardware store will have replacement screening. While it’s possible to repair the screen while it’s still in the window, it probably will be easier to remove the screen from the window, or take a sliding door off the track.
Using a utility knife or shears, cut a square patch that is 1” to 2” larger than the hole. Unravel a few strands on all four edges of the patch, leaving single strands sticking out along each edge. Overlay the patch on the damaged area, weave the loose strands through the screen and then bend the strands on the other side to secure the patch to the screen with needle-nose pliers. Once the patch is on, you can add a touch of clear adhesive for even more stability.
If the hole is more than about 3” wide, you’re better off replacing the screen. You can purchase a roll of screening and other tools for the job at your local True Value hardware store.
You’ve worked hard and now your home and yard look awesome. Well done!