Your planters can be made of almost anything. You can reuse wood barrels, plastic drums, buckets or even create your own planter. Also, your local True Value hardware store has a variety of planters in different styles and different constructions, such as terra cotta, plastic, wire baskets, ceramics and wood.
Safety Alert!
If you’re reusing a container that once held chemical products, don’t plant vegetables or fruits in the container as there may be left over residue that could be ingested. It’s best not to use such a container for any of your plantings for the healthiest results.
Select a planter that is appropriately sized for your desired plant or group of plants. This is especially important for larger groups of plantings or small trees or shrubs. You must be very careful of this when planting from seeds. The container will need to be able to accommodate the plants when fully grown. The container must be able to hold enough soil to nourish all of the roots and provide enough capacity for adequate watering. The more soil there is the more water is retained; without enough soil, plants can dry out between waterings. A general rule of thumb is a container should be at least 12” deep with a comparable, if not larger, diameter.
Helpful Tip
Keep the entire planter’s weight (with water) in mind if you plan on moving it frequently. If a tree or shrub is already in a heavy container, the weight of added water will make it that much heavier. Plan your planter’s placement accordingly or place planters on wheeled platforms that can be easily moved when needed.
Adequate drainage is as important as size. You want plants to get as much water as they can without getting waterlogged. Too much water in soil leaves no room for oxygen. It also can foster mold growth and plant disease. Choose containers with multiple drainage holes in the bottom. Many containers will also have drainage holes on the sides. If you’re creating your own planter or repurposing something as a container, you can also drill or punch the needed holes into the container. You can place the planter in a planter saucer to catch overflow if you don’t want water leaking on patio surfaces, etc.
Step 2: Use Quality Soil
Use high-quality organic potting soil in your planters. While it may seem like “dirt is dirt,” it is best not to skimp on quality by choosing a cheap, low-quality potting soil. Good potting soil is usually almost completely free of weeds, insects and other organisms that can harm the plants. It also usually has a slightly acidic pH, which is good for growth for most plants. When selecting potting soil, choose a mix that specifically identifies what it’s made of. Avoid bags that just say “peat” or “compost.” Instead, look for potting soil with specific ingredients, like “Sphagnum Peat Moss.” This potting soil will be higher quality and better for your plants. Where possible, choose a potting soil that has organic amendments such as manure or compost mixed in. If not, you can also add these amendments separately to your soil. Be sure to ask someone at your local nursery how best to use these natural bloom boosters. Follow all package instructions.
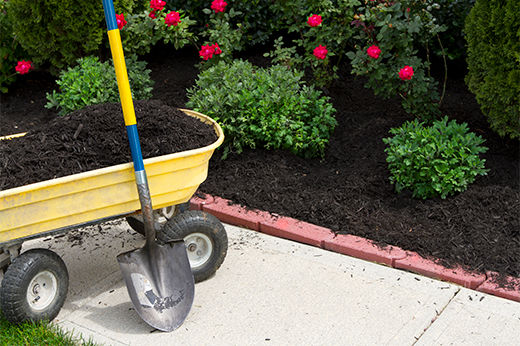
Step 3: Fill Planters
First, place your planter in the desired location, especially if you will be filling large containers or using larger plant types. When filling your container, pour the potting soil or soil/amendment mix to about 1/3 of the way full. For purchased plants, take the plant out of its pot and gently shake off the old potting soil from the root ball. If the roots are tightly wound with burlap, gently slice the sides of the root ball in two or three places. Insert the plant stem or root ball. Fill in around the sides of the root ball with more potting soil, pressing lightly. The plant should be at the same soil level as it was originally growing, and there should be a 1/2” – 1” space from the top of the soil to the lip of the planter.
If you’re starting from seed, plant them as instructed by the seed manufacturer, according to the package. Spread the seeds lightly into the soil then gently rake them into the soil with a hand rake You can also use a garden trowel to move dirt around when you’re seeding. Lightly tamp down the loose soil so it makes contact with the seeds to insulate them and better provide nutrients.
Step 4: Feed and Water Plants
Container plants need more watering than plants that grow in the ground. The containers themselves can draw water from the soil inside of them through evaporation. Also, because there is less all-around soil, the water is used quickly.
Helpful Tip
Plastic containers don’t dry out as quickly as natural-material planters such terra cotta, stone or wood.
Check to see if the container needs water by sticking your finger into the soil. If it feels dry, add water with a garden hose or watering can. Water your plants by thoroughly soaking the soil, then allow it to drain. To ensure your plants grow healthy and strong feed them immediately after potting, and on a regular basis, as directed by the manufacturer. Use a liquid plant food, available at your local True Value hardware store.
That’s all there is to it! Get started on your container planting now to make your outdoor spaces beautiful this season.