


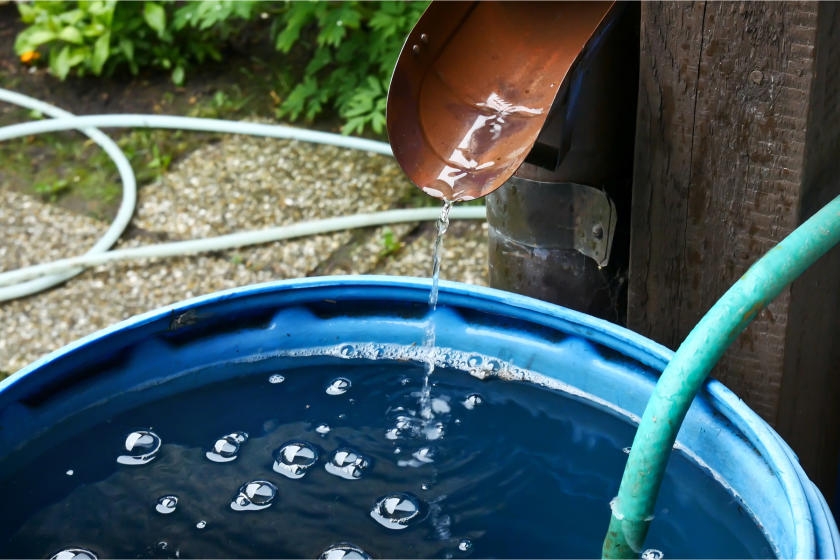
Homeowners use a lot of water every year watering the lawn or garden, which means that a lot of water and money goes, as they say, down the drain. Installing a rainwater collection system at the end of your gutter downspouts controls excess surface water and buckets it for use on your lawn. Cut down on needless water use and save money by trying this natural resource-saving irrigation technique.
Step 1: Get a Container
You need a fairly large container to collect the water when it comes down the spout from your gutters. A 55-gallon barrel or cistern is all you need to hold enough water for watering your lawn and garden or to wash your car. You can buy specially designed containers for collection; these containers come with outlets for hoses and for filling watering cans. To save money though, you can make your own container out of a polyethylene, fiberglass or metal barrel or drum, which is what this project will focus on.
Safety Alerts!
Only use containers meant to hold water or food. Don’t use any container that once held chemicals.
Never use the water collected for drinking.
Helpful Tip
Check with your local municipal officials to make sure it is legal to collect and hold water for reuse.
Place your rainwater container on concrete cinder blocks near where your gutter downspout ends. Stack the concrete blocks so that the container is level, sturdy and won’t tip over. You’ll most likely need about four blocks so that you can stack them and raise the container about 2′ off the ground, which will make it easier to retrieve water.
Step 2: Make a Filter Top
Make the top of your rainwater container by cutting off the top of a 5-gallon bucket. The bucket’s lid will be used to secure a paint strainer to the top of the bucket, thereby keeping large objects, mosquitoes and other insects and debris from getting into the barrel and spoiling your water supply.
Use a power drill with 7/8″ spade bit to punch a hole in the side of the 5-gallon bucket. This will make it easy to cut off the top with your jigsaw. Then secure a mesh paint strainer to the bucket opening to filter out objects and mosquitoes in your barrel or drum. Discard the rest of the bucket scrap. Keep the bucket lid (you’ll need it later).
Helpful Tip
To prevent matter from hanging too far down into the rain barrel, tie a knot in the strainer before installing it into the lid.
Next, use a permanent marker to trace a circle around the newly cut five-gallon bucket top onto the top or lid of your large 55-gallon water container.
Use your drill (with the same 7/8″ spade bit) to punch a hole in the top of the 55-gallon container and then use the jigsaw again to cut along the traced circle. After being cut, the top of the 5-gallon bucket should fit perfectly in the opening of the large container.
Next, use a permanent marker to trace around the bottom edge of a gutter extension on the top of the bucket lid. Use the 7/8″ bit to drill a starter hole and then cut the lid with your jigsaw to fit the gutter extension. Place the lid on the top of your new filter to check for proper fit.
Step 3: Attach Gutter Extension
Using the existing downspout from your gutters, add an extension — your local True Value hardware store carries a variety of extensions and fittings for this type of alteration.
Measure and mark where you need to cut the fitting so that the end will run into the top of your collection barrel. Most fittings are made of flexible plastic and can easily be cut with a utility knife. Note that it may be necessary to use a splice to fit the end of your existing downspout into the extension. Push the two pieces together until they are snug and seal them together with an appropriate adhesive. Use brackets to secure the fitting to the side of your house.
Step 4: Install a Spigot
Lastly, you need a way to get the water out of your collection system. Put in a spigot at the bottom of the container by drilling a hole using the 7/8″ spade bit. File down the rough inside edges of the hole with a metal file and then screw in a 3/4″ spigot securely. Seal around the spigot with waterproof silicone caulk. Be sure that the spigot is facing the right way on the barrel so you can access it easily when you start actually using it. Simply turn the spigot handle and fill up buckets or watering cans.
Step 5: Install Water Pump (Optional)
If you plan on connecting a garden hose to the spigot to water your garden or wash a car, you may need to install an irrigation pump or water-pressure booster pump. Without a pump, you might not have enough water pressure to push the water from the container through the hose with enough force. To get close to the same amount of water pressure as a standard household tap, a pressure-boosting pump is essential.
Take into account the size of your yard or garden when choosing a pump. A small pump is good for a standard, tiny garden, while a larger pump with more horsepower is needed if you’re going to water a normal-sized yard. An expert at your local True Value hardware store can help you pick the pump that is right for you. Because pump models differ widely by manufacturer, the method of connecting one to a rainwater collection system can depend on the specific pump. After you’ve purchased the pump you need, follow the supplied instructions carefully during installation.
Great job! You’re done. Now let your gutters and the rain do the work. You’ll soon have a reservoir of free water to care for your lawn and garden.
Project Shopping List
Here’s what you’ll need to complete this project successfully.
- 55-gallon barrel or drum
- Manufactured rain barrel
- Concrete cinder blocks
- 5-gallon bucket
- Power drill
- 7/8 spade bit
- Jigsaw
- Mesh paint strainer
- Permanent black marker
- Downspout extension
- Tape measure
- Utility knife
- Splice
- Adhesive
- Brackets
- Metal file
- 3/4 spigot
- Caulk gun (optional)
- Waterproof silicone caulk
- Irrigation pump or water-pressure booster pump (optional)