Keep it Clean and Shiny
Step 1: Wash It
One of the best car care tips you can receive is to keep your cars exterior clean. Washing your car often can remove harmful debris and reduce the chance of your car rusting. Choose a shady spot in which to work. It’s usually best to wash your car in the morning or evening when the sun isn’t as intense, but if you have a spot in the shade to do the job, it doesn’t matter what time of day you start. Let the car exterior cool down if it has been in the sun for an extended period of time.
Fill a bucket with a couple capfuls of concentrated car cleaning solution and water (check manufacturer’s directions for exact amount of cleaner to use). Wet down the entire surface of the car using a garden hose with a spray nozzle. Dip a sponge or washing mitt into the bucket and start on the roof of the car.
Helpful Tips
Always start at the top of the car so dirty water and grime aren’t washed down over an area you’ve already cleaned.
Don’t use dishwashing detergent for your cleaner because it can strip away car wax.
Stay away from using old rags to wash your car. They often can cause hairline scratches on the finish.
Using the sponge or washing mitt, wash the roof of the car and clean the windows. Stop there and rinse. You want to wash and rinse the car in sections to avoid the soap’s drying on the surface before you spray it off. Choose either the hood or trunk of the car, clean it and rinse it. Continue working by washing either the front or back (depending on where you chose to continue) and then rinsing. Then proceed down one side of the car, one panel at a time, washing and rinsing. Repeat these steps on the opposite side. Don’t forget to wash the rearview mirrors.
Wheels and tires should be cleaned last. Since they make contact with the road and collect the most oil, dirt and grime, it makes more sense to clean the rest of the car first so you don’t transfer dirt from them to the rest of the car. Grit from the tires and lower panels of the car can also stick to your sponge and then scratch your car’s paint elsewhere. Wet the wheels with your hose and then spray a wheel and tire cleaner onto them. Let the solution sit for a minute or two and then wash them with the washing mitt and soap. Rinse them off.
Helpful Tip
Scrub tires with wheel and tire cleaner and a stiff brush. Only clean the rubber though; be careful that you don’t use the brush on your rims as the brush might scratch them.
Use a bug and tar remover to remove caked on bugs and any tree sap or road tar that may have collected on the car’s finish. Simply apply a bit of cleaner to a soft rag and wipe debris away. Stubborn debris may require a couple of applications. Rinse the cleaned area with your hose. WD-40 is a good home remedy for removing caked-on bugs and debris if used sparingly. It should only be used on small, tough-to-clean areas. Simply spray it on the desired area, let it sit for 30 seconds and then wipe it and the offending debris away with a rag.
Step 2: Dry It
Dry the car using soft, clean towels that you keep specifically for drying your car, or better yet, use microfiber drying towels or chamois. Chamois, commonly known as shammies are leather cloths, designed to soak up water better than a regular towel and help prevent water spots.
Step 3: Apply Protectants
After the vehicle has dried, pour (or spray) a dab of vinyl and rubber protectant onto a clean rag and wipe it on all vinyl, plastic or rubber parts on the vehicle exterior. These will most likely include door and window moldings, trim, rearview mirrors, and tires. Wipe with a circular motion for complete and even coverage. Wait for the protectant to be absorbed. Once it is absorbed, the surface will look and feel dry. Then with a new, clean rag, wipe down the parts.
Step 4: Wax It
Waxing your car protects the paint and finish. In essence, it seals the exterior and protects it from the elements, UV rays, salt, splattered insects and bird droppings, while it leaves the car looking shiny and new. Car wax usually comes as a paste, liquid or cream. There is endless debate about which brand or type of wax to use, but most car enthusiasts prefer a carnauba-based wax in any form. One application of this wax usually lasts about six to eight weeks.
Before applying, either dip an applicator pad into the wax container (for pastes and creams) or pour a small amount onto the pad (liquid). Many waxes are sold with applicator pads, but they can also be purchased separately.
Helpful Tips
Dampen the applicator before applying wax for best results.
Remember to shake up containers of liquid wax before use and from time to time during application.
Apply wax to one section or panel of the vehicle at a time. Start by framing the section which is applying the wax along the edges in a straight line. This gives you better control and helps prevent getting wax in and on unwanted areas, like plastic or rubber trim. Then fill in the rest of the area by wiping the wax on in a circular motion. As it dries, the wax will form a haze. This usually just takes a few minutes. Use a clean, soft microfiber cloth to wipe away the haze. Try to use one small section of the cloth when wiping each area, so you still have clean cloth to wipe the next section. Repeat this process over the entirety of the car’s finish.
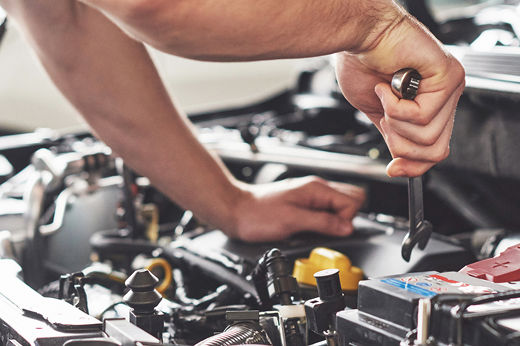
Maintain Your Car
While looks can go a long way, if you want your car’s beauty to be more than skin deep, regular maintenance is required to keep it running smoothly for a long time. Read your owner’s manual. The manual has a lot of important and helpful information in it that you should know about the car you’re driving.
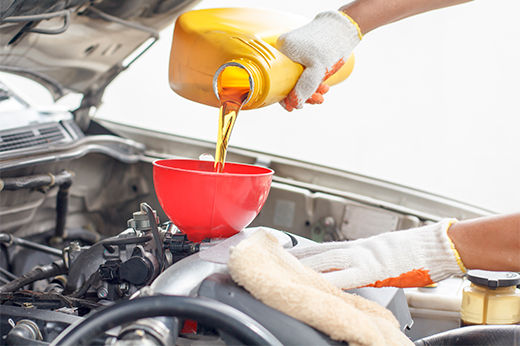
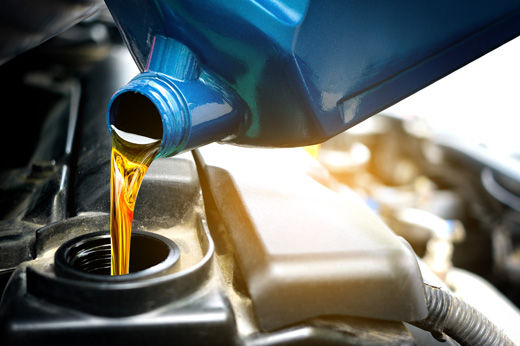
Change the Oil
The most important routine maintenance you can perform on your vehicle is to change the oil regularly. Refer to your owner’s manual for the manufacturer’s recommended oil type, capacity, filter type and oil change intervals. Traditionally, it has been recommended that you change oil every 3,000 miles, but oil life can be extended, depending on the car and the oil used.
Helpful Tip
Remember to check your oil regularly to ensure that it’s not too low and to note any changes in consistency or color.
While more and more drivers rely on quick-lube shops or their mechanic, changing oil is relatively simple to do. Your local True Value Hardware store will have the motor oil, oil filter and anything else you need to do it yourself.
Check the Tire Pressure
You should regularly check your tire pressure. Keeping tire pressure consistent at the recommended pressure improves gas mileage, makes the tires wear better and last longer. Remove the cap from the tire’s air intake valve and press a tire pressure gauge onto the valve. The gauge will show you how much air is in the tire. If your tires need air, fill them up at a service station to the car’s manufacturer recommendations, or if you own an air compressor, you can use it to fill your tires. If there is, for some reason, too much air in the tire, you can let air out by pressing on the metal pin inside the valve with a pen or another similar, slender object.
Safety Alerts!
Check your tires’ tread depth by pushing a penny in between the treads. If you can see any of Lincoln’s head, you might need new tires.
Replace any missing tire valve caps to help sustain tire pressure.
That’s it! Your car should now be looking its best.