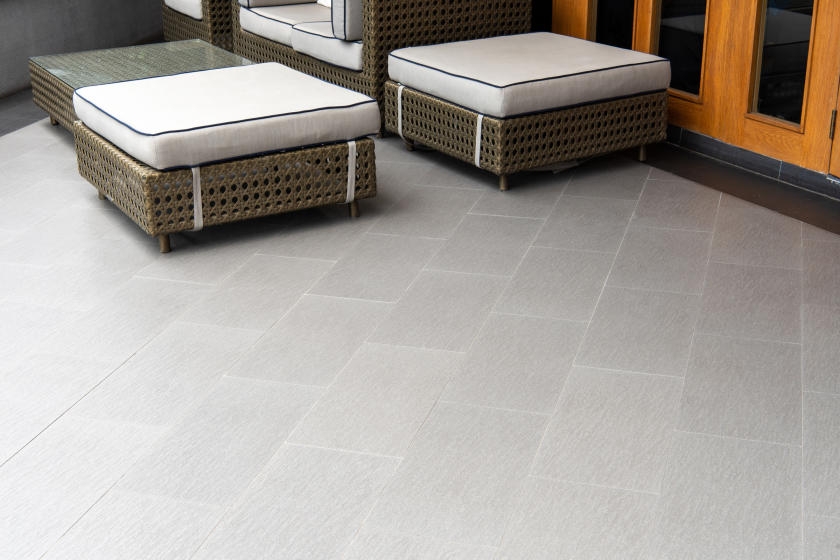
Are you tired of your concrete slab of a patio? You can give your patio new life and convert it into a luxurious outdoor living area by laying down decorative tile. It’s a project that takes some effort, but you’ll add value to your home while you treat yourself to an outdoor oasis.
Step 1: Prepare the Surface
Make sure the existing patio surface is clean and level. Clean the surface using a concrete cleaner, such as Trisodium Phosphate (TSP), and either a pressure washer or a stiff scrub brush. This will help you to see any cracks, pits or uneven parts of your patio. It also ensures optimal adhesion for the tile mortar. A flat, level surface will also keep your decorative tiles from cracking under foot traffic. If the slab is finished with paint or another sealer, or if your patio is excessively rough, you’ll need to grind the surface with a scarifier.
Safety Alert!
TSP can be corrosive. Make sure you wear protective clothing, gloves and eyewear before working with TSP.
If you have wider-than-hairline cracks in the concrete, you’ll have to fill them to keep the tile from cracking after it’s laid. Use a liquid-applied crack isolation membrane to fill any cracks. With a paint brush or roller applicator, apply the liquid before applying the reinforcing membrane. Finish with another coat of liquid and allow it to dry. Using a good concrete patch or leveler, smooth the surface and let it dry thoroughly. Next, apply a concrete sealer with a small paint brush. This will allow better mortar adhesion.
Helpful Tips
Always wear kneepads when kneeling on hard surfaces.
Check the weather forecast. If there is a possibility for rain during your project, set up a temporary tarp cover to keep water away from your work.
Step 2: Plan the Layout
Using two perpendicular chalk lines, mark the center of your patio.
Helpful Tip
Use the “3-4-5 triangle rule” to verify that your centerline is perpendicular to the house and to the other centerline. From the corner formed by two intersecting lines, measure out 3 feet along one line and 4 feet along its perpendicular. The diagonal connecting these two points must equal 5 feet.
Put a grout joint on these centerlines or center a tile row over them, whichever gives you the best layout. Temporarily position a row of tiles along each line with plastic spacers to test your layout.
Helpful Tip
There are a number of tile types to choose from, including porcelain, ceramic or stone. Be sure you choose a tile appropriate for your area’s climate. In cold climates, the temperature changes from freezing to thawing can crack your tile work, leading to a lot of repair work down the road. Check tile water-absorption rates and look for tiles very resistant to water absorption, such as those less than .5% water absorption. This will usually be some type of porcelain tile.
Step 3: Prepare, Mix and Apply the Mortar
Mix a thin-set latex-Portland cement mortar. Using your chalk line as a guide, spread a small amount of mortar with a notched trowel over a 2×5-foot section of the concrete. The size of the tile you are using will determine the size of the notch on the trowel. For example, because larger tiles require more adhesive, you should use a trowel with larger notches. Tilt the trowel so that you leave mortar only in the ridges created by the notches.
Be careful that you don’t mix too much mortar in advance–you don’t want it to set up before you can use it. A good rule of thumb is to spread just enough mortar for three or four tiles.
Step 4: Set the Tiles
Cover the back of the tile with mortar. Set the tiles using plastic spacers to maintain desired grout joints. Press each tile into place and tap it with a rubber mallet to firmly set and level it with adjoining tiles. Remove the spacers just before they get out of reach.
To allow for expansion and contraction, provide expansion joints wherever the tile meets a vertical surface, like the house or any stairs. Large patios need expansion joints every 12 feet. Provide an expansion joint by removing the wet mortar along the joint down to the concrete. Use polyurethane caulk instead of grout to fill the joint.
Step 5: Grout the Tile
Let tile set overnight before applying grout. Mix grout to a sour cream consistency and apply it with a rubber float. Push the grout diagonally across the tile with the float tilted at a 45-degree angle. Then make a final pass with the float tilted at nearly 90 degrees. Allow grout to stiffen and sponge off excess with a damp sponge.
Step 6: Clean Up
Once the grout is completely dry, wash the patio surface with a wet rag. You’ll notice a haze forming over the tile as it dries, but allow it to dry completely. Go over the tiles one more time with a damp rag to polish off the remaining grout and mortar residue. Once you are sure the grout has fully cured, use a grout sealer to prevent stains and mildew formation.
Congratulations! You’ve just transformed your patio into a beautiful outdoor living space.
Project Shopping List
Here’s what you’ll need to complete this project successfully.
- Concrete cleaner
- Pressure washer
- Stiff scrub brush
- Scarifier (if needed)
- Leveler
- Isolation membrane
- Brush
- Roller applicator
- Concrete sealer
- Kneepads
- Tarp
- Chalk
- Ceramic tile
- Tile spacers
- Latex cement mortar (thin-set)
- Mortar
- Mixing container
- Notched trowel
- Rubber mallet
- Expansion joints
- Grout
- Rubber float
- Large sponges
- Bucket
- Rags
- Grout sealer


