Know Your Mold and Mildew
Mold can grow in your home wherever there’s an abundance of moisture, especially when it’s allowed to remain for extended periods of time. Mold usually appears on walls, ceilings and floors of homes where moisture management is not at its best. In particular, basements, shower walls and windowsills are areas where mold commonly likes to live. Mold and mildew, for all intents and purposes, are essentially the same thing; mildew is generically used to describe many minor mold problems in the home, such as on shower tile grout. However, some molds can become highly toxic to people if left to prosper. Mold can cause allergic reactions, asthma and other respiratory complications, and is especially a risk for small children, the elderly and those with existing respiratory illnesses or weakened immune systems. Mold can appear in many shapes and colors, none of which accurately determines the actual species of mold. However, it does commonly present itself in various tints of black, white, green or blue, and in many combinations of these and other colors.
What is Black Mold?
Black mold is often found inside houses with excessive moisture damage to wallboard and other surfaces. Much is made of this type of mold’s “toxicity” but the mold itself isn’t harmful. It does however have the potential to produce mycotoxins that can cause harm to people and pets, depending on the particular species of mold. A rule of thumb should be “use caution” when removing all molds, especially when in abundance.
What is White Mold?
White mold is often found in cool, damp environments such as in basements on walls and other structures. It is often confused with efflorescence, which is a mineral deposit that forms on foundation walls and other masonry surfaces due to water seepage. You can test to see if it’s mold by spraying it with water. If it dissolves, it is a mineral deposit; if it does not, then it’s most likely white mold.
What is Blue Mold?
Blue mold is another common color of household mold that can appear in damp areas of the home, such as on bathroom walls and ceilings. Moisture that builds up on walls after long, steamy showers can be just the right conditions for this mold to begin to form and thrive.
What is Green Mold?
Green mold is also very common in houses and like blue mold often appears in damp areas such as on shower walls and damp corners. As with most molds, green mold can be removed by scrubbing it away with a solution containing bleach.
Control Moisture
According to the U.S. Environmental Protection Agency (EPA), there is no way to eliminate all mold and mold spores indoors. The key to mold control is controlling indoor moisture:
- Fix Water Problems (leaks, etc.) – Fix leaks as soon as you find them. Not only does a leaky basement or roof mean immediate structural damage, if not remedied, the waterlogged areas allow mold to thrive. Clean and dry any damp or wet building materials within 24 to 48 hours to prevent mold growth. If you don’t, and mold infiltrates them, they will need to be removed to completely fix the mold problem. To learn more about fixing leaks, see How to Repair Basement Leaks and First-Aid for Roof Leaks.
- Reduce Indoor Humidity – The more humid your home is, the more likely it will be a haven for mold spores. Reduce humidity by increasing your home’s ventilation to keep the air from becoming warm and stagnant. Vent large appliances, such as washer/dryers, as well as your bathroom and kitchen. Also, turn on air conditioners and dehumidifiers to reduce moisture in the air. If you don’t have an air conditioner or bathroom vent fan, consider installing one yourself by seeing How to Install a Window Air Conditioner and How to Install a Bathroom Exhaust Fan.
- Prevent Condensation – Insulate exterior walls, roofs, windows and pipes to reduce the potential for moisture forming from condensation. To learn how to do this yourself, see DIY Attic Insulation Tips, How to Insulate Basement Walls, and How to Prevent or Thaw Frozen Pipes.
Remove Mold from Basement/Concrete Walls
Step 1: Prepare the Area
You’ll notice mold in your basement by its appearance—usually black, white or bluish patches on the walls. It can also grow on any organic material adjacent to the mold-covered areas, such as carpeting, cardboard boxes, etc. Remove these affected items from the wall and dispose of what you can. Furniture may be salvaged with a good cleaning, but in some cases it may have to be thrown away. Moving these items out of the way will also give you room to work when removing the mold.
Step 2: Start Scrubbing
There are many commercial products available to kill mold. Bleach, however, is considered the best thing to kill it, especially when combined with old-fashioned hard scrubbing. Mix one part bleach with three parts water in a bucket. Using a scrub brush or heavy-duty sponge, vigorously scrub the mold-affected wall with the bleach/water solution until the mold spots have disappeared. In some cases, you may need to let the solution remain on the wall for a few minutes after you’ve applied it to let it soak in. For tough mold-infested areas, you many need to use both a formulated mold remover and a bleach/water solution to get the job done.
Safety Alert!
Wear rubber gloves to protect your hands and safety goggles to avoid splashing the bleach solution in your eyes. Also, wear a respirator mask or dust mask to keep from breathing in any mold particles that may become airborne. If possible, ventilate the basement while you work. Wear old clothes, since you may get some of the bleach on yourself.
After you’ve scrubbed the affected walls, dry them with a towel and check the surface for any mold growth you may have missed. Put the items you moved back into the basement, but make sure you don’t put back anything with mold on it—you may end up back where you started in a few weeks.
There may be some stains on the walls even after you’ve scrubbed them. These can be removed by using a mold/mildew stain remover, available at your local True Value hardware store.
Helpful Tips
Purchase a dehumidifier for your basement to keep the air dry and as inhospitable to mold as possible.
Keep an eye out for any leaks in the basement.
If you plan on painting the basement walls, use EasyCare Ultra Premium Interior Primer/Sealer and EasyCare Ultra Premium Interior Paint. It may also be necessary to seal your basement with a waterproof sealant before you prime and paint to keep out moisture and mold.
Remove Mold from Drywall/Painted Walls
Mold can often grow on drywall and painted interior walls, especially in areas where moisture and humidity are a factor, such as kitchens and bathrooms. Walls can also be affected if your roof or exterior walls are infiltrated by water. If the drywall remains wet, mold can begin to grow and penetrate the drywall throughout. When this happens, the drywall must be removed and replaced, as you will not be able to get rid of all mold under these circumstances.
Step 1: Assess the Damage
If you notice mold on any interior walls, assess the condition of the wall and the extent to which the mold has taken over. If the drywall has been compromised, is crumbling or bowed out and covered with black or bluish splotches, it will need to be replaced. If the wall is structurally sound but still covered with mold, you should be able to remove the spots with a cleaner and a bit of scrubbing.
Safety Alert!
Some mold is better off remediated by professionals because it may be harmful when present in large amounts. While unlikely, unless your home has extensive water damage from flooding or some other catastrophe, you probably won’t come across an excessive amount of this kind of mold, commonly referred to as “black mold.” If you do have large amounts throughout an interior area—anywhere around 10 sq. feet—it is recommended that you call a professional to have it removed.
Step 2: Prepare the Area
Because you’ll be using bleach or commercial mold-killing chemicals to remove the mold, you’ll need to protect surrounding surfaces, such as flooring, from any kind of spills that might cause damage. Cover the floor with plastic drop cloths and tape them into place with painter’s tape so they don’t move around. It doesn’t hurt to keep some old towels handy to catch any spills.
Step 3: Get Rid of the Mold
The best thing for removing mildew and mold from walls is a bleach/water solution. Mix one part bleach to three parts water and apply it with a sponge or rag. There are also a number of commercial solutions available at your local True Value hardware store.
Safety Alert!
Wear waterproof rubber gloves when cleaning with bleach or other cleaners to protect your hands.
Helpful Tip
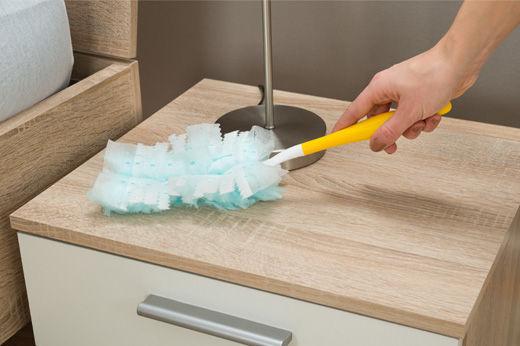
In kitchens and bathrooms, tile grout can sometimes develop patches of mildew. You can scrub this away with an old toothbrush. Wash down the walls after you’ve scrubbed.
Step 4: Use a Stain-Blocking Paint
When you’ve finished cleaning away the splotches of mold, there still may be stains left on wall surfaces. Prime the wall with True Value EasyCare Ultra Premium Interior Primer/Sealer then paint using True Value EasyCare Ultra Premium Interior Paint as a topcoat.
Congratulations, you’re done! Stay vigilant and look for potential signs of mold by keeping in mind where and how it can grow.
Project Shopping List
Here’s what you’ll need to complete this project successfully.
- Commercial mold remover (optional)
- Heavy-duty sponge
- Bleach
- Bucket
- Scrub brush
- Rubber gloves
- Safety goggles
- Respirator or dust mask
- Towels
- Mold and mildew stain remover
- Dehumidifier
- EasyCare Ultra Premium Interior Paint
- EasyCare Ultra Premium Interior Primer/Sealer
- Waterproof sealant
- Plastic drop cloths
- Painter’s tape