


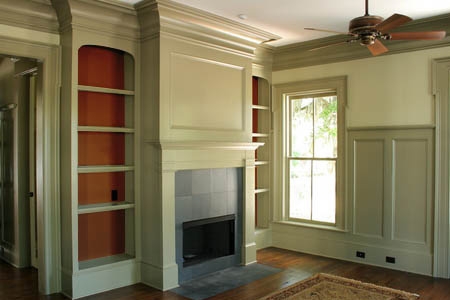
By simply painting the back wall of a built-in bookcase, you can instantly add more depth, dimension and interest to any room in your home. With just a couple of coats of paint, a boring storage space can be transformed into a stunning backdrop that showcases your books, pictures and collectibles.
Step 1: Prepare for Painting
Remove all items on the bookcase, as well as the shelves, if possible. Move the bookcase to a well-ventilated work area such as a garage or outdoor deck or set the bookcase in the center of the room away from other surfaces you don’t want paint on. Make sure your work area is dry and free of dust. Use painter’s tape to secure a large drop cloth or tarp to the floor to protect it from spills.
Primer and paint do not adhere to dirt, so make sure you properly clean surfaces before you start. Use a mild solution of detergent and water, and scrub it thoroughly with a sponge or soft brush. Rinse with water to remove any soap residue and allow it to dry thoroughly.
Step 2: Remove Old Finish
If needed, scrape away any loose varnish or paint by sanding and/or using chemical strippers. Chemical strippers are an easier method but read the manufacturer’s directions carefully before applying. Use a medium-sized paintbrush to apply the solution evenly over the surface. Let it soak for 20 to 30 minutes and then remove the old finish using a plastic scraper or a smooth, round-edged putty knife. The surface may be soft so be careful not to damage it with the scraper. Allow the bookcase to dry completely.
Safety Alerts!
Always wear rubber gloves and protective goggles when using strong chemicals.
Stripping chemicals and stains are extremely flammable and can ignite so never refinish near an open flame.
Helpful Tips
Use chemical strippers clearly marked “no clean-up” or “will wash away with water.” The “no clean-up” type strippers may leave a residue, however, which must be sanded away. Residue from the “wash away” type can be removed by rinsing with water. Be aware that water may raise the grain of the wood. Lightly sand to reduce this effect.
Heat guns can be used as a supplement to other methods to remove particularly stubborn finishes. Make sure there isn’t any flammable residue left from the stripper.
Step 3: Sand
The more thorough you are during the stripping process, the less you’ll need to sand. Start sanding with medium-low-grit sandpaper to clean off any finish that remains and to smooth out any imperfections in the wood. Then smooth the whole piece down with fine-grit sandpaper. Be sure to sand along the grain of the wood. Do this carefully as any swirl marks caused by sanding will stand out when you paint. Remove sawdust with a hand vacuum, brush or soft, damp cloth.
Safety Alert!
Always wear gloves, protective goggles and a dust mask when sanding.
Step 4: Prime
Apply True Value EasyCare® Ultra Premium Interior Primer/Sealer with a paintbrush, moving from right to left, then left to right, spreading the paint evenly with horizontal strokes. Allow the primer to dry for up to 2 hours, or until it is dry to the touch. Feel the furniture’s surface for any rough spots and sand lightly if necessary but only after the primer has had at least 24 hours to dry.
Step 5: Apply Paint
Use True Value EasyCare® Ultra Premium Interior Paint with a brush, moving from right to left, then left to right, spreading evenly with horizontal strokes. Allow the first coat of paint to dry completely. If using a bold color, apply a second coat of paint for best results.
Helpful Tips
If wall coverings, ceiling and flooring all share a similar color scheme, go bold and choose a dramatic eye-popping color to really highlight the area. Choose paint with a slight gloss to create a vibrant appearance.
Step 6: Clean Up
Pick up your drop cloths or tarps and close up your paint cans. Dispose of used paint cans appropriately. Cleaning paint brushes and other tools can be made easy with warm water and soapy water. Thoroughly rinse your roller covers and brushes in water until the water runs clear, then place them in a brush/roller spinner, if you have one, to remove excess liquid. Store in their protective sleeves or hang them on nails or hooks. Pick up drop cloths carefully, making sure you don’t spread around any paint that may have gotten on them. Next, remove painter’s tape at a 45-degree angle to avoid removing any fresh paint. Remember that the longer it stays on, the harder it is to remove.
Great job! With a few hours and a little bit of paint, you have a brand new bookcase!
Project Shopping List
Here’s what you’ll need to complete this project successfully.
-
- Painter’s tape
- Drop cloth
- Sponge
- Cloth
- Chemical finish stripper
- Medium-sized paintbrush
- Plastic paint scraper
- Rubber gloves
- Safety glasses
- Dust mask
- Heat gun (optional)
- Medium-low-grit sandpaper
- Fine-grit sandpaper
- Hand vacuum
- Brush
- EasyCare® Ultra Premium Interior Primer/Sealer
- EasyCare® Ultra Premium Interior Paint