


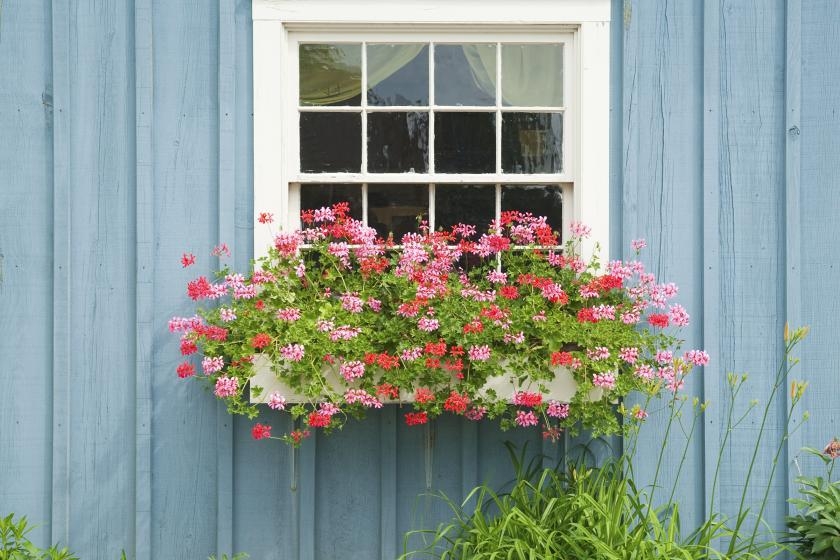
Flower boxes can add life and color to your house — inside or outside. Building a planter box yourself is a fun weekend project and you will enjoy the results for years to come.
Plan Your Window Planter
The first step in building window boxes is deciding what kind of wood to use.
If you plan to mount your window box outdoors, you must use wood and materials that can withstand the elements. Cedar, redwood and treated lumber are good choices because they are naturally weather resistant. As long as the wood is treated with some kind of waterproofing your planter should last for years.
If you plan to mount your window box indoors, you can choose a wood and finish to complement your interior woodwork — or for a more personalized touch, try your hand at a decorative painting technique like sponging or stenciling to match your décor. If you do plan on painting the planter box, build it with any select (knot-free) grade of wood such as pine or poplar. If you prefer a natural finish, consider a fine hardwood such as oak or maple.
Helpful Tip
Waterproofing the interior of the planter will allow you to put soil directly into it. However, not all plants have the same watering needs. If you have a range of plants in the planter, it is best to pot them individually. This will make it easier to change out plantings, if need be, and maintain the planter.
How to Build the Window Planter
Step 1: Determine the Dimensions
You’ll get the best results by building your window planter as wide as the outside dimension of the window casing but no wider than the windowsill. The planter should be at least deep enough and high enough to accommodate a 6-inch diameter flowerpot. We suggest that you use 1” x 8” lumber for the ends and faces and 1” x 6” lumber for the bottom, at a minimum.
Step 2: Cut and Mill the Parts

Cut the pieces for the front, back and ends from your “good” lumber. You can use a lesser-grade lumber, such as No. 2 pine, for the bottom. Use a circular saw or table saw when cutting the pieces for your planter.
For the front and back, cut or plane a 5-degree bevel along the bottom edge of each piece.
To make the ends, cut (with the grain) two pieces of 1” x 8” lumber to be 6” wide. This will correspond to the height of the end. Then cut the sides of those pieces at an 85-degree angle to create a 5” and a 6” base on these two trapezoidal pieces.
To create the bottom, set the saw’s bevel adjustment to 5 degrees, and cut (with the grain), the piece of 1” x 6” lumber so that it is 5” wide. Use a plane to bevel a 5-degree angle on the two lengthwise edges. Next, cut the bottom piece 3/4” shorter than the length of the front and back pieces so it will be recessed 3/8” and fit properly with the front and back when assembled.
Step 3: Sand Parts Smooth
Use a rubber sanding block or finishing sander and sand all the pieces smooth. Start with a coarse sandpaper, such as an 80-grit paper, then use a finer 120-grit and finishing with 220-grit paper. The coarser paper removes rough edges and splinters, while the finer paper prepares the wood for finish. Always sand along the length of the boards with the grain.
Step 4: Assemble the Indoor Planter


Using a small brush with a 1/2” tip, apply waterproof wood glue on all edges of the bottom and rest it on 1/2” thick spacers. Clamp the two ends onto the bottom and pre-drill 3/32” pilot holes for the fasteners with a cordless drill. Secure the ends to the bottom with 6d galvanized finishing nails.
Glue the front and back edges of the end pieces; similarly clamp and attach the faces to the bottom and the ends. Wipe off excess glue with a damp cloth and touch up with your sander as needed.
Helpful Tip
Pre-drilling prevents the fasteners from splitting the wood (especially hardwoods) and makes it a lot easier to accurately drive the nails or finishing screws.
Step 5: Waterproof the Interior
Mask the top edges of the planter with masking tape and apply a synthetic rubber coating to the interior surfaces. Synthetic rubber coating is available in spray cans or as a brush-on liquid. It will form a flexible, waterproof surface when it dries.
Step 6: Apply a Finish
When the interior surface dries, reposition the masking tape over the top inside edge and finish the sides and top with any interior or extrior paint, stain or polyurethane finish.
Step 7: Install the Planter Under a Window
Once you’ve put the planter together, it’s time to put it in place. To mount the planter on shelf brackets or on a shelf supported by brackets, you’ll have to install those brackets into solid wall framing with screws. If you mount the planter to the brackets, glue 1/2” wood spacers to the bottom at the bracket locations.
Alternatively, you can mount the window box using hanger bolts. To do this, drill two 1/2″-diameter holes into the planter about a ¼” of the way in from the ends and 1-1/2″ below the top. Hold the planter in position under the window where you’re mounting it and hammer a 3/8″ hanger bolt through each hole, slightly into the exterior surface of your house to mark it, or use another method to mark where the holes should be. Drill two ½” pilot holes at the marks and then hammer in the hanger bolts, leaving about 2″ of each bolt sticking out. Hang the box on the bolts and put a 3/8″ washer and nut on the end of each bolt.
Step 8: Setting Your Plants and Flowers
If you plan to place soil directly into your planter, don’t forget to provide drainage. Put at least 1-1/2” of crushed stone in the bottom of the planter, covering it with a layer of landscape fabric before you add soil and plants. If you prefer to keep plants in their pots, simply put the pots in the planter and fill around them with sphagnum moss, pine bark or similar mulch.
Helpful Tip
Set smaller pots on blocks of wood or on some mulch so their tops will be even with those of larger pots.
Great job! Now you know how to build planter boxes of your own and you’ve given your windows a little extra life with a floral flourish.
Project Shopping List
Here’s what you’ll need to complete this project successfully.
- 1″ x 8″ knot-free lumber
- 1″ x 6″ lumber
- Circular saw
- Table saw
- Plane
- Rubber sanding block
- Finishing sander
- Sandpaper (80-, 120- and 220-grit)
- Artist’s paintbrush
- Waterproof wood glue
- Clamps
- Cordless drill
- Hammer
- 6d galvanized finishing nails
- Cloth
- Masking tape
- Synthetic rubber coating
- Interior or extrior paint
- Interior stain or finish
- Exterior stain
- Shelf brackets or shelf supported by brackets
- Screws
- 1/2″ wood spacers (optional)
- Crushed stone (optional)
- Landscape fabric (optional)
- Potting soil
- Plants
- Pine bark or mulch (optional)
- Blocks of wood (optional)