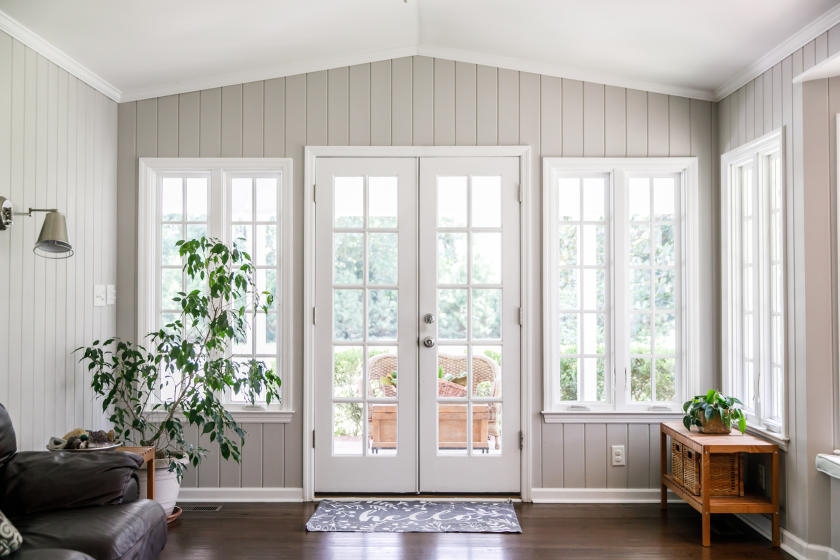
Wood paneling was once a design element prevalent in kitchens, living rooms, family rooms and finished basements. Interior design trends have changed and many homeowners are opting for brighter, more colorful surfaces in their homes.
While many choose to tear out the outdated wood paneling, painting can be the easiest and most cost-effective way to update dark, tired-looking wood-paneled walls.
Step 1: Prepare the Room
Remove everything possible from the room. Anything that can’t be moved should be placed in the center of the room and covered with drop cloths. Remove electrical outlet plates and any wall fixtures. Move out area rugs and cover carpeting with drop cloths. Apply painter’s tape to any trim or other features you don’t wish to paint or drip paint on.
Safety Alert!
If you are removing fixtures, make sure to turn the power off at the circuit breaker and cover the breaker switch with tape so as to avoid electrocution. This serves as a reminder to others not to restore power. Run an extension cord into the room for work lights.
Because fumes from paint can be odorous and overwhelming, ventilate the room by opening windows or installing a box fan in an open window to pull the fumes outside. Open another window just outside the room to allow for cross-ventilation. This minimizes dust and fumes throughout of the rest of the house as well.
Inspect your wood paneling for any protruding nails. You don’t want to run across one of those while you’re cleaning the walls. To avoid injury, tap the nails back in with a hammer to make them flush. While you’re at it, check the paneling for any loose or damaged panels. If you find loose panels, simply nail them back to the wall with paneling nails. Severely damaged panels may have to be replaced.
Step 2: Clean the Walls
Get a bucket, a sponge and some dishwashing liquid and wipe down the paneling with the soap and water solution. Let the paneling dry before going on to the next step. If the paneling is in or near a kitchen and has a build-up of grease, take time to clean it with an ammonia, water and detergent cleaning solution. For stubborn dirt and grime, use an abrasive cleaning pad dampened with mineral spirits. In both cases, turn on the exhaust fan and wear rubber gloves and eye protection.
Step 3: De-shine the Paneling
There are two solutions for removing the surface finish that prevents paint from bonding well to wood paneled surfaces. You can sand the entire wall with fine sandpaper in a pad sander or brush on a de-glossing chemical, such as Liquid Sander. All items are available at your local True Value hardware store.
Safety Alerts!
Always wear a face mask when sanding.
If you use the chemical de-glosser, follow the directions on the label and wear hand and eye protection when using them. Most de-glossers are only effective for a few hours before they must be coated with paint, so keep that in mind when you plan your work.
Step 4: Prime the Walls
It’s recommended that you apply a quality primer, such as True Value EasyCare® Ultra Premium Interior Primer/Sealer before painting. Most primers dry quickly and can be covered with a topcoat within a few hours, but check the label. A bonding additive can also be stirred into the first coat of paint instead of a bonding primer if you prefer.
Helpful Tip
Have your primer tinted to the approximate color of your topcoat.
Step 5: Caulk Cracks
Paint will make any joints and open cracks between the paneling and trim (or ceiling) more noticeable. This is a good time to seal them with acrylic latex caulk. Cut off a small portion of the end of the cartridge tip, fill the joints, and smooth with a wet finger or ice cube.
Step 6: Paint the Paneling
Paint the paneling with True Value EasyCare® Ultra Premium Interior Paint. Cut in (outline) an area with an angled sash brush or edging-pad paint applicator and then roll on the paint using a roller applicator with ½”-nap roller cover.
Step 7: Clean Up
If you’re going to continue working the next day, wrap paintbrushes and rollers in plastic and seal with a rubber band around the handle to keep them from drying out. Once the project is complete, clean everything with warm, soapy water. Use paint thinner on applicators only if necessary.
Helpful Tips
A brush/roller spinner is a great way to remove excess water from brushes and rollers. The tool both simplifies the task and does a better job of cleaning your equipment.
Make sure you find out where and how to dispose of paint thinner properly. Some states have laws that do not allow you to pour paint thinner down the drain.
Once the paint is dry, replace fixtures, outlet plates, pictures, etc. Restore power to the room and replace furnishings and rugs.
You did it! Take a step back and admire your new, freshly painted, room.
Project Shopping List
Here’s what you’ll need to complete this project successfully.
-
- Screwdriver
- Plastic drop cloths
- Canvas drop cloths
- Painter’s tape
- Extension cord
- Work light
- Box fan
- Edging pad applicator
- Hammer
- Paneling nails (optional)
- Bucket
- Sponge
- Dishwashing liquid
- Ammonia
- Abrasive cleaning pad
- Mineral spirits
- Rubber gloves
- Safety goggles
- Fine-grit sandpaper
- Pad sander
- De-glossing chemical
- Dust mask
- EasyCare® Ultra Premium Interior Primer/Sealer
- Putty knife
- EasyCare® Ultra Premium Interior Paint
- Bonding additive (optional)
- Paint roller
- Roller cover
- Acrylic latex caulk
- Caulk gun
- Angled sash brush
- 1/2″ nap roller cover
- Paint thinner
- Roller spinner


