


A faux finish on your walls can be a beautiful touch to your room, but if it’s outdated or you simply want a change, it’s not always as simple as just painting over it. Prepping the surface and priming it correctly are essential to painting over a faux finish with satisfying results. Keep reading to learn more.
Step 1: Prepare the Room
Prepare the space for painting. Remove furniture from the room or place it in the center of the room, covered with drop cloths or tarps. Place drop cloths on the floor and secure them with painter’s tape. Remove fixtures, window coverings, switch plates and outlet covers. Also use painter’s tape to protect windowsills, baseboards, door hinges, the ceiling perimeter and anything else that you don’t want to get sanding dust or paint on.
Step 2: Sand the Walls (Optional)
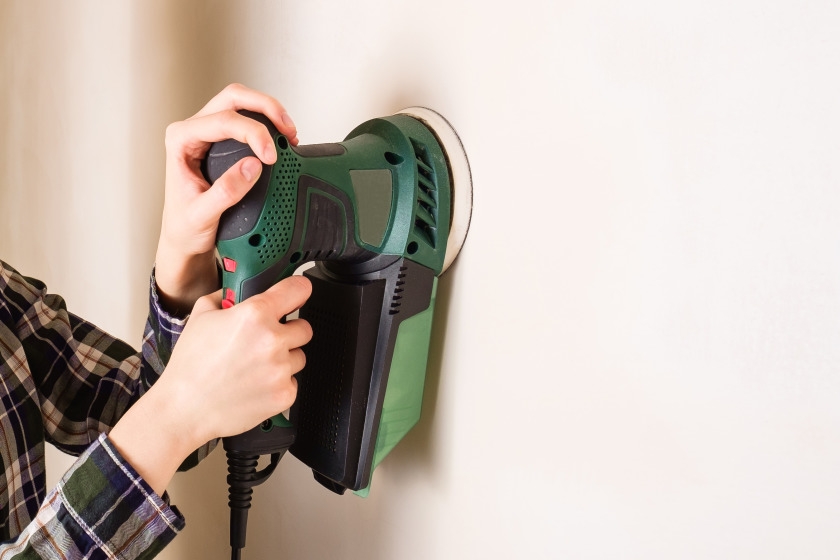
Surface preparation is the most important step to successfully painting over a faux finish, particularly if the faux finish has texture. If your walls are textured, you can sand the surface to remove it. Use a random-orbit sander to remove the texture and return the wall to a smooth finish.
Prepare the sander by attaching a fine-grit sanding disc to the sander’s head. Attach the dust catcher onto the sander. This can be connected to a shop vacuum to collect the majority of the dust created by sanding. This will cut down on the amount of dust in the air but it won’t remove all dust—be prepared to clean up dust when you’re done sanding.
Safety Alert!
Wear safety glasses and a dust mask or respirator to protect yourself from the dust created by sanding.
•If you’re removing old paint, it may contain lead. Lead is toxic, and scraping, sanding or removing old paint may release lead dust into the air. Children and women who are pregnant should stay away from the work area during this process. When you’re working with lead dust, wear a NIOSH-approved respirator and clean all debris carefully with a HEPA filter-outfitted vacuum and a wet mop. Before you start, learn the proper methods to protect yourself by contacting the National Lead Hotline at 1-800-424-LEAD or visiting http://epa.gov/lead.
Turn on the sander and hold it to the wall, being careful to keep the sanding head flush against the wall. You don’t want to risk creating a groove in the wall by sanding too deeply at an angle. This will also help you use the entire surface of the sanding disc for a more uniform job. Keep the sander moving across the surface; don’t hold it in one place for too long, lest you sand too deeply. Occasionally wipe away dust from the wall to ensure you’re removing all of the texture.
When finished sanding, use your shop vacuum to clean the dust from the entire room and wipe away remaining dust on the walls using a cloth.
If walls have cracks, holes or other damage, apply spackling compound with a putty knife. Once the compound sets, lightly sand the repaired areas with fine-grit sandpaper. Remove sanding dust with a cloth.
Step 3: Clean the Walls
Use a sponge or cloth to wipe down your walls with a solution of all-purpose household cleaner and water and allow it to dry. Paint doesn’t adhere to dirt or dust. If your walls have tough stains or mildew, scrub the walls with a soft-bristled brush and a solution of trisodium phosphate (TSP) and water.
Safety Alert!
Use TSP as directed by the manufacturer. TSP can corrode metal and damage finished wood. Be sure to wear safety goggles, protective clothing and rubber gloves.
Step 4: Use a Quality Primer
Whenever you’re drastically changing color or finish, a quality latex primer, such as True Value EasyCare Ultra Premium interior Primer/Sealer, is necessary for desirable results. A primer is a special type of paint that goes on before the finish coat of paint. Primers lay the foundation of your paint job and ensure that the painting surface has an ideal, uniform texture (slightly coarse) so that your paint topcoat adheres effectively. In addition, primers cover up the existing finish, as though you’re starting from scratch. They also seal up porous surfaces and prevent stains.
Applying primer is similar to painting. Priming doesn’t require as much care, but you’ll use the same technique. Start with your paintbrush bristles coated with 1″ of primer to do wall brushwork in areas a roller can’t reach, like in corners, next to doors and windows, molding, and around fixtures. Use a roller applicator to prime the main part of the wall, working in 3 to 4′ square sections. Make a series of overlapping “W” strokes from right to left, then back from left to right. Spread the primer evenly using vertical strokes. Continue in 6′-square sections until the entire surface is primed.
Safety Alert!
Primers and paints can give off fumes that can be hazardous if exposed to for extended durations. Be sure your workspace is well ventilated. Open windows and/or use fans to circulate the air or draw it outside.
Helpful Tips
Apply a second coat of primer when you’re going from one extreme color to the other, especially if you’re going from dark to light. Wait for the first coat to dry and then repeat the same process.
Don’t wait too long after priming to apply the finishing coat of paint. Check the instructions on the can of primer to determine how quickly you should start painting once it has completely dried.
Step 5: Paint
Get ready to paint. Using quality paint is as important as choosing the right primer. Higher-quality paints provide better coverage and are more durable. They’re easier and quicker to apply, limit paint runs and drips, and require fewer coats.
On interior surfaces, use True Value EasyCare Ultra Premium Interior Paint. The Hardwarians at your local True Value hardware store can answer any questions you have about paint quality and color and provide advice on how to paint over your existing faux finish.
Once you’ve decided what colors to use, you’ll need to know how much to buy. When estimating, a good rule of thumb is to multiply the length of each surface by its height and add another 30 percent for good measure. Typically, one gallon of paint will cover 400 square feet. Buy more than you think you’ll need; you can always use the extra for touch-ups.
As you did with the primer, start with your brush, cutting in from the ceiling, corners and other areas you can’t reach with your roller. Paint next to doors, windows and molding and around fixtures. Next, coat your roller in a paint tray and start painting the main part of the walls widthwise in 3 to 4’ square sections, using a zigzag pattern of overlapping W strokes. Move from right to left, then left to right, spreading evenly with vertical strokes.
Feather (apply less pressure to) the edges of the squares to eliminate overlapping lines between each section. If your paint has a flat finish, you don’t need to blend. Otherwise, go over the entire surface (for very large areas, do two square sections at a time) with one-directional, overlapping, non-diagonal strokes once again. If necessary, apply a second coat of paint using the same technique as the first. You don’t have to let the paint completely dry between coats, but your results will be better the longer you wait.
Step 6: Clean Up
Rinse your roller covers and brushes thoroughly in water until it runs clear, and then place them in a brush/roller spinner or shake them thoroughly to remove excess liquid. Store in their protective sleeves or hang them on nails or hooks. Remove the drop cloths and tarps and pull off painter’s tape at a 45-degree angle to avoid removing any fresh paint. Return the room’s furniture, fixtures and other belongings to their rightful places in the room.
Great job! You’ve painted over your old faux finish and refreshed the walls in your room.
Project Shopping List
Here’s what you’ll need to complete this project successfully.
- Drop cloths or tarps
- Painter’s tape
- Random-orbit sander
- Fine-grit sanding disc
- Shop vacuum
- Safety glasses
- Dust mask or respirator
- Cloth
- Spackling compound
- Putty knife
- Fine-grit sandpaper
- Sponge or cloth
- All-purpose household cleaner
- Soft-bristled brush
- Trisodium phosphate
- Rubber gloves
- EasyCare Ultra Premium Interior Primer/Sealer
- Paintbrush
- Roller applicator
- Paint tray
- EasyCare Ultra Premium Interior Paint