


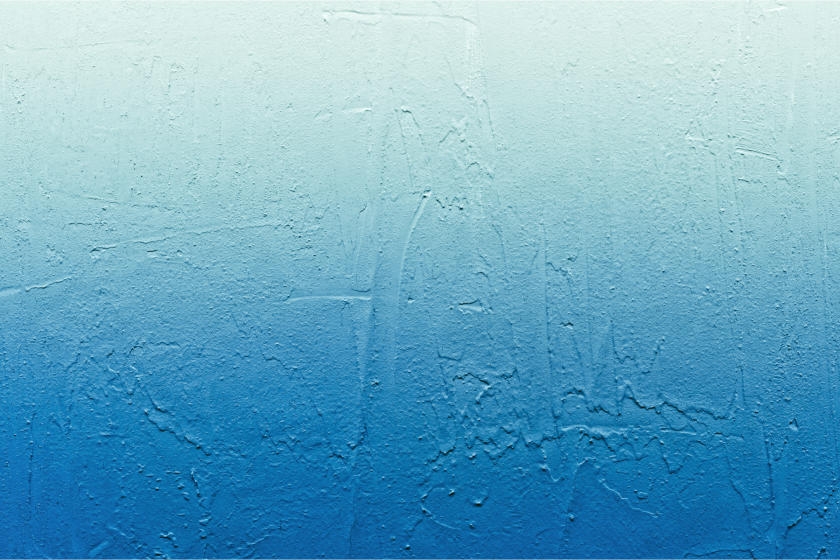
If you’re looking for an interior ambiance that is a little bit out of the ordinary yet contemporary and fashionable, look no further than ombré painting. Ombré is a hot trend in interior painting that adds drama and interest to walls by gradually blending or fading from one color into another—up or down a wall, from light to dark or vice versa. You can use different hues of the same color family or complementary colors, depending on the look you’re trying to achieve. This project will describe how to create the effect going down the wall from light to dark with hues from the same color family
Follow these tips on how to paint your walls with an ombré effect and instantly transform your interior spaces.
Step 1: Prepare the Room for Painting
Remove furniture from the room or place it in the center and cover it with drop cloths. Place drop cloths on the floor and remove window coverings, switch plates and outlet covers. Use painter’s tape to protect trim, windowsills, baseboards, door hinges and the ceiling perimeter.
Clean and repair the wall. Properly cleaning and repairing surfaces is extremely important when painting since paint doesn’t adhere to dirt or damaged areas. Using a sponge or cloth, wipe down your walls with all-purpose cleaner and water and allow it to dry. If your walls have cracks, holes or other damage, apply spackling compound or acrylic caulk with a putty knife. Sand with fine sandpaper once it dries.
Step 2: Prime the Walls
Prime your walls if they are stained. This is recommended if you plan to use light-colored paint over dark-colored walls or you are otherwise making a drastic change in color. Apply True Value EasyCare Ultra Premium Interior Primer/Sealer with a roller. Paint widthwise in 6-ft. square sections, using a zigzag pattern of overlapping “W” strokes. Move from right to left, then left to right, spreading evenly with horizontal strokes.
Helpful Tip
You can skip this step by painting with True Value EasyCare Ultra Premium Interior Paint.
Safety Alert!
Open the windows to make sure you’ll be priming and painting in a well-ventilated area.
Step 3: Paint a Base Coat
Apply the first coat of paint in the lightest shade of your color choices. Pour True Value EasyCare Ultra Premium Interior Paint into a paint tray and coat your roller. Paint widthwise in 6-ft. square sections, using a zigzag pattern of overlapping “W” strokes. Move from right to left, then left to right, spreading evenly with horizontal strokes.
Let this coat dry completely for the amount of time recommended on the paint can.
Step 4: Divide the Wall into Sections
Divide the wall into at least three equal horizontal sections. In this case, start with the lightest color (base coat) at the top, a medium shade in the middle and the darkest hue at the bottom of the wall.
Use a tape measure to measure the entire wall and then divide the wall into the three uniform sections, marking each lightly with a pencil and a straight edge such as a yardstick. Don’t worry about making pencil marks; you will be painting over them.
Step 5: Paint the Middle and Bottom Sections
Paint the second-lightest shade in the middle section. Pour the paint in your paint tray and coat your roller. Apply the paint, leaving 3” to 6″ of room at the top and bottom edges. You will use these areas to blend the sections together later.
Paint the bottom section the same way you painted the middle, leaving 3” to 6” between it and the middle section above.
Step 6: Blend the Sections
Blend the edges of the sections together. In a separate paint tray, mix your lightest color and the middle color together equally, at a 50:50 ratio. Use a paintbrush to apply this blend to the 3” to 6” section you left between the top and middle sections. Hold the brush at an angle to get the desired transition effect. Remember that this blended section will appear a little rough but this transition area of the ombré technique is supposed to look “blurred”.
Repeat the mixing process with the middle color and the darker color in a new paint tray. Apply the paint to the transition between the middle and dark sections, holding a brush at an angle to blend the two sections together.
Helpful Tip
You can also use the same paint tray for each mix but use separate paint tray liners for each blend of colors.
Let the paint dry for the amount of time recommended on the label.
Step 7: Clean Up
Pick up your drop cloths or tarps and close up your paint cans. Dispose of used paint cans appropriately. Cleaning paintbrushes and other tools can be made easy with warm, soapy water. Thoroughly rinse your roller covers and brushes in water until the water runs clear. Store in their protective sleeves or hang them on nails or hooks. Pick up drop cloths carefully, making sure you don’t spread around any paint that may have gotten on them. Next, remove painter’s tape at a 45-degree angle to avoid removing any fresh paint.
Great job! Step back, admire your work and enjoy your hip new interior vibes.
Project Shopping List
Here’s what you’ll need to complete this project successfully.